RSS Feed

Author Archives: Kristin

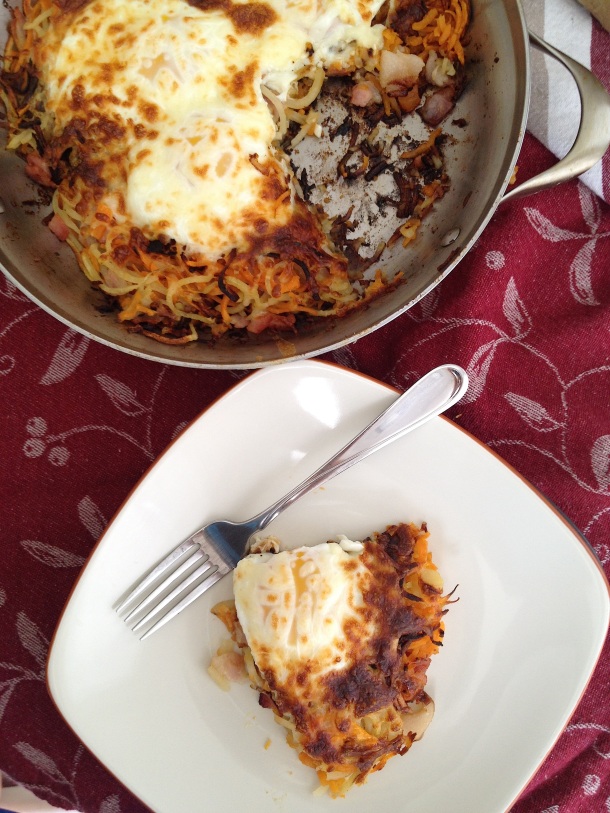
Spiralized Hash Brown, Egg, and Bacon Bake

Posted on

Crispy potatoes and bacon topped with baked eggs and a sprinkle of mozzarella cheese. A hearty breakfast, brunch, or breakfast for dinner casserole!

Spiralized-Potato-Bacon-Egg-Bake-Slice

I really wanted to get this post up a week ago, but time was just not working in my favor. Seeing 600+ children a week with coughs and runny noses had me fighting off a cold. I had activities scheduled for every evening, and even had work events on the weekend. I tried to sit down and blog on Wednesday evening and nearly fell asleep at the computer! I really don’t want to give up writing this blog, so I’m going to try to stick with a short and sweet post this week. I’m sorry I missed out on getting this up last week!

Strangely enough, the last recipe I posted was also for a breakfast. You’d think that with getting up at 6am most days, then being at work by 7am, I would not be making many complex breakfasts. Somehow, that seems to be where most of my food creativity has been lately! Once it’s the weekend I just want a breakfast that isn’t as boring as the same old weekday stuff.

This “hash brown”, egg, and bacon skillet is definitely more of a weekend breakfast/brunch item. Maybe even breakfast for dinner type of food. It’s hearty and filling!

Spiralized-Potato-Egg-Bacon-Bake-Square

This recipe started with me really enjoying using my spiralizer. I use it all the time for dinners, but less often for other meals. Sure, I could just use (and have used) a grater to make hash browns, but spiralized potatoes seem more exciting! I like this breakfast with a combination of white and sweet potatoes to keep the flavor interesting and include more nutrients than usual white potato hash browns.

Spiralized-Potato-Bacon-Egg-Bake-Tall

Add some diced bacon, eggs, and a handful of cheese to the cooked potatoes and you have an all-in-one meal. Just pop in the oven on broil for a few minutes to cook the eggs! Believe it or not this breakfast/brunch doesn’t take forever to make. It’s not quite quick enough for a rushed morning, but can easily be cooked from start to finish in under 30 minutes! Totally worth it for special weekend morning!

Spiralized-Potato-Egg-Bacon-Bake-Over

Spiralized Hash Brown, Egg, and Bacon Bake

This serves 2 – 4, but is easily variable. Choose larger potatoes or crack a few extra eggs on top to increase the number of servings.
 
Ingredients
  • 1 small white potato
  • 1 small sweet potato
  • 4 slices of bacon (regular or turkey bacon both work)
  • 4 eggs
  • 1/4 c mozzarella cheese
  • cooking spray
Directions
  1. Spiralize both potatoes using the medium sized blade. Alternatively, you can use a julienne peeler or mandoline to cut the potatoes into thin strips.
  2. Generously spray an oven-safe skillet with cooking spray. Add the spiralized potatoes to the skillet, mix a bit to even out the two varieties if need, and then turn the burner on to medium heat. Let the potatoes cook for about 10 minutes on the first side. Use a spatula to peek at the bottom of the potatoes every once and a while to see if they are browned.
  3. While the potatoes are cooking, dice the bacon and sprinkle it over the cooking potatoes.
  4. After about 10 minutes, or once the bottom of the potatoes are browned flip them. The potatoes will have cooked together pretty well, but may still separate. Just do your best, and flip in a few smaller sections in you need to.
  5. Let the potatoes cook on the second side for another 10 minutes or so, until the bottom is just starting to brown. When you notice the bottom is getting crisp and light brown crack the eggs on top. Sprinkle the mozzarella cheese on top of the eggs.
  6. Put the whole skillet in the oven, on broil, for about 5 minutes, for soft yolks, or a few minutes longer if you want fully cooked yolks. I test egg-doneness by shaking the skillet a bit. You’ll be able to see how firm the eggs are by how much they move.
  7. Remove from the oven and cut into wedges to serve.


Gluten Free Weekly Meals (What I Ate Last Week) #18

Welcome to this week’s post of Gluten Free Weekly Meals! Every week, I take photos of the gluten free recipes I make from all over the web and then share my thoughts. Throughout the week you can find pictures of what I’ve been eating on my Instagram (tastefullygf) and Twitter (@tastefullygf). Each Monday I post a list of my favorite gluten free meals from the last week. You’ll see my photos of the food, a link to the recipe, and any modifications I made. To see previous “Gluten Free Weekly Meals” posts, just use the search bar on the right side of the page. You can also find these recipes on my Pinterest boards. I hope these posts provide you with some gluten free cooking inspiration!
 
Breakfasts

I had something I haven’t had in a a while for breakfast this week – 2 Ingredients Pancakes! Simple and healthy, these are definitely a winner. One batch is about 250 calories, which isn’t quite enough to fuel me through the morning, so I add some natural peanut butter to my pancakes. It adds another yummy flavor + some protein and needed calories!

2-Ingredients-Pancakes-WIALW18I’ve been working on a recipe for Pumpkin Pancakes the past few weeks. I’ve got a great recipe, but my pictures were less than awesome. I’ll have to take them again on a better lit morning, when I’m also not in a rush! I’ll have the recipe and photos out on the blog sometime in October/November!

Pumpkin-Pie-Pancakes-WIALW18

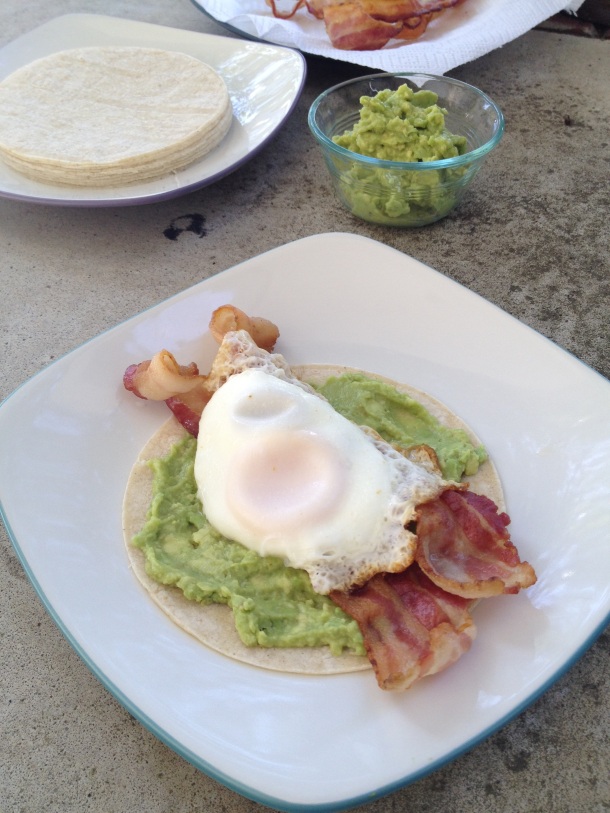
And, finally, I photographer these Egg and Avocado breakfast wraps I’ve been talking so much about lately. They’ll be up in a few weeks, too!

Breakfast-Tacos-GF-WIALW18

Dinners

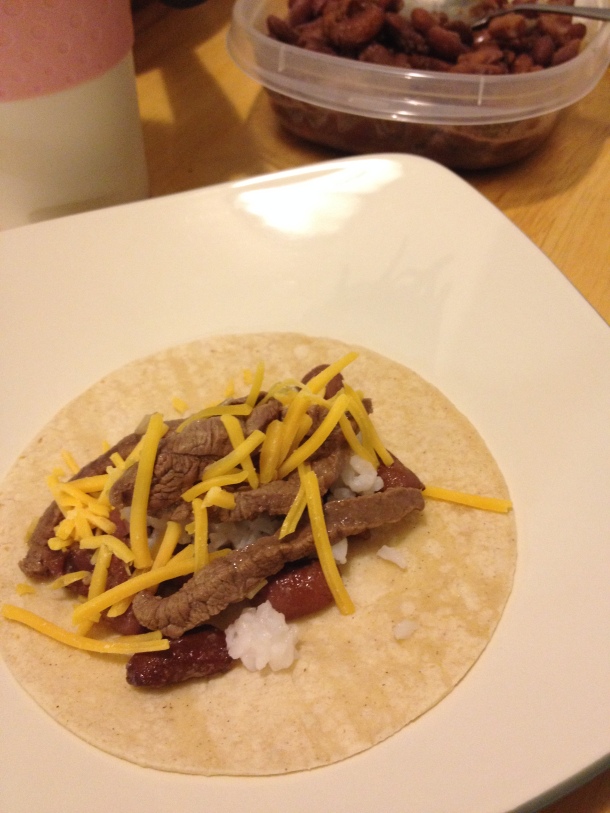
One of our first dinners of the week were Steve’s Beef & Bean tacos. We realized after taking a few bites the meat wasn’t quite seasoned enough, so I added some taco sauce to mine after the picture was taken. The beef was a great taco filling for a busy night! After cutting it into thin strips it only takes a few minutes to cook!

Beef-Bean-Tacos-WIALW18

I made a few creative spiralized recipes this week. I always save my broccoli stems (and do various things with them). I had three or four in the refrigerator when I saw this recipe! I made a few changes based on what I had in the kitchen already. I was surprised at how long it took me to cook. I was expecting the meal to have faster prep, but looking back the time makes sense. Spiralizing broccoli stems is much more time consuming than something softer like zucchini! In the end, the meal was delicious. Steve commented that he thought he liked it more than he expected. I even ate the leftovers cold!

Broccoli-Noodles-Chicken-Chickpeas-WIALW18

My other creative spiralized recipe of the week was this grain-free chicken parmesan with garlic zucchini noodles. I just ate these leftovers for my lunch today, and was remembering how good the dinner was! I’ll talk about it more when I do a whole post for the recipe – there are so many good things to say! It’s one of those “who knew healthy food could be so delicious?!” meals!

Grain-Free-Chicken-Parmesan-with-Garlic-Zucchini-Noodes

Gluten Free Meals (What I Ate Last Week) #17

Welcome to this week’s post of Gluten Free Weekly Meals! Every week, I take photos of the gluten free recipes I make from all over the web and then share my thoughts. Throughout the week you can find pictures of what I’ve been eating on my Instagram (tastefullygf) and Twitter (@tastefullygf). Each Monday I post a list of my favorite gluten free meals from the last week. You’ll see my photos of the food, a link to the recipe, and any modifications I made. To see previous “Gluten Free Weekly Meals” posts, just use the search bar on the right side of the page. You can also find these recipes on my Pinterest boards. I hope these posts provide you with some gluten free cooking inspiration!
 
Breakfasts

I’m not too much of an early morning person, but knowing I have a good breakfast coming to me sometimes helps me get out of bed. These egg and avocado breakfast tacos have really quickly become a favorite for us. I love just the egg and mashed avocado wrapped in a tortilla, but my husband loves his with bacon added in his breakfast taco. Cooking up bacon and eggs in the morning actually doesn’t take very long at all, which is a big plus!

Egg-Avocado-Breakfast-Taco-WIALW17

Another great breakfast this week has been granola. Usually I’m not too keen on the gluten free granolas, but I have a few varieties stashed in the cupboard. I’ve been mixing a chocolate version with an unsweetened version in a 1 to 3 ratio with some milk. It’s a great solution for a rushed morning!

Gluten-Free-Granolas-WIALW17

Dinners

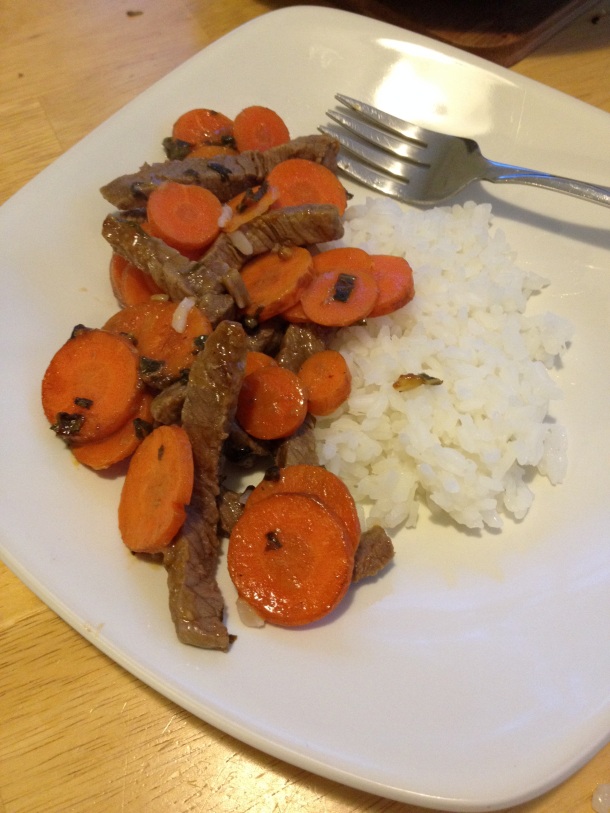
First up for the dinners this week was Steve’s stir fry invention of the week. This stir fry was beef and carrots with a crazy sauce. I think Italian dressing was the base, but there was a decent amount of sriracha in there for some heat, among other things. The inventive sauce was good, but I don’t really enjoy the flavor of carrots so it wasn’t my favorite meal ever.

Beef-Carrot-Rice-Stir-Fry-WIALW17

I made one of our most favorite dinners ever this week. We call it “Dolphin” (long story) but it is actually called Roz bi Farakh and the recipe is on MidEats. After lots of experimenting I’ve found that sauteed kale is the perfect accompaniment to this chicken, rice, and yogurt sauce. The flavors are all simple things you probably have in your pantry, but come together perfectly. My only modifications to this recipe are adding extra lemon juice to the chicken marinade, and making the sauce entirely with greek yogurt, rather than a yogurt/mayo combination. It’s always a hit!

Chicken-Rice-Yogurt-Sauce-Kale-WIALW17

We had another one of my most favorite meals ever this week, Thai Basil Chicken. We needed to do some some major trimming on one of our Thai Basil bushes, so this recipe was the perfect solution for what to do with all of that freshly cut Thai Basil. This recipe was the second post I ever made on this blog, so the photography over on that post is a bit embarrassing. I encourage you to try this anyway, though. It’s excellent! On this particular day I served Thai Basil Chicken with rice and roasted broccoli. I seasoned the broccoli with garlic and chili powder before roasting it in the oven. It was also quite good. Steve had to remind me to finish the chicken and rice on my plate and stop eating all of the broccoli out of the serving bowl!

Thai-Basil-Chicken-WIALW17

One thing I made this week, and didn’t get a photo of was the Bacon Beef Butternut Squash from Civilized Caveman Cooking. I had this pinned for a while and was waiting for butternut squash to go on sale to try it. The squash took way longer to cook than the recipe said (maybe difference in ovens?) and it wasn’t quite as flavorful as I hoped. I may try this again sometime when I have more time to cook the squash, and also use beef with a higher fat content for a bit more flavor. The balsamic carmelized onion topping was quite tasty – no changes needed there!!!

Last on this week’s list are Buffalo Turkey & Veggie Flatbreads. The recipe inspiration is from Little Leopard Book. I’ve made a number of changes, mainly based on ingredients that I keep on hand. I make a creamy base using greek yogurt and dry ranch seasoning, then double the veggies that go into the buffalo turkey mixture. I make mine with corn tortillas and Steve’s with flour tortillas. These are tasty and really filling! I made three for myself, and was full after one and a half! Luckily, my favorite leftovers are usually buffalo flavored foods!

Grilled-Buffalo-Turkey-Veggie-Flatbreads-Gluten-Free-WIALW17

Hope this post gives you a bit of inspiration for your gluten free meals this week! See you on Thursday for a new recipe!

Sweet Potato Pancakes (Gluten Free, Dairy Free, Paleo)

Grain free, dairy free, refined sugar free, and paleo sweet potato pancakes. Just in time for fall breakfasts and brunches!

Paleo-Sweet-Potato-Pancakes-Front

I’ve been on the hunt for a good sweet potato pancake recipe for a looonnnggg time. This is that recipe I’ve been looking for!

Sweet-Potato-Pancakes-Close

I found it over on Smile Sandwich (now, just saying, I seriously love that blog name. So cute!) after scrolling through at least one whole page of Pinterest in the “Food & Drink” catergory. Now, I’ve seen lots and lots of sweet potato pancakes on pinterest. Most sweet potato pancakes seem to fall into 2 categories. The first being “sweet potato” pancakes where there seems to be more flour or sugar in the recipe than sweet potato. This was not the type of recipe I was looking for.

Paleo-Sweet-Potato-Pancakes-Over

The second type of sweet potato pancakes are the paleo, organic, sugar free pancakes that are very … free form? … in shape. Do you know what I’m talking about? I really don’t have any problems with pancakes like this, really. You should see Grain Free Banana Pancakes when I make them NOT for a photograph. They are every shape but round. I’m a fan of perfection though, so I wanted at least the option of a perfect looking pancake.

Sweet-Potato-Pancakes-Tall

Well, right when I saw the perfect looking sweet potato pancake on Pinterest I knew I needed to try the recipe. I ended up making a few modifications and loved the results! Sweet Potato is the main ingredient! Rather than using sugar, I sweetened these a bit with pure maple syrup. Talk about a yummy fall breakfast: sweet potato + maple syrup!

Sweet-Potato-Pancakes-Light

Scan the ingredient list below and you’ll also notice this recipe is dairy free, grain free, and can easily be egg free with modifications. And I’m sure you didn’t miss the pictures – these super healthy sweet potato pancakes still look perfect (and I promise, I didn’t totally rig it, like with those banana pancakes).

Do yourself a favor and try these pancakes some morning soon!

Sweet-Potato-Pancakes-Slice

Sweet Potato Pancakes

This recipe calls for mashed sweet potato. To quickly make mashed sweet potato: Peel the sweet potato and cut it into 1-2″ cubes. Add to a saucepan of water and bring to a boil. Reduce to a simmer. Pierce potato pieces every few minutes with a fork. Once softened (around 10/15 minutes), drain the water and mash the sweet potato cubes in a bowl.
 
Ingredients (serves 2)
  • 1 c mashed sweet potato
  • 2 T coconut flour
  • 4 eggs (replace with 2 flax eggs for egg free version)
  • 1/2 t baking powder
  • 1/2 tsp baking soda
  • 1 tsp cinnamon
  • 1/4 c pure maple syrup (more for topping, if desired)
Directions
  1. Add the eggs to a mixing bowl and beat with a fork.
  2. Add the remaining ingredients and thoroughly mix until a batter forms.
  3. Heat a nonstick skillet or griddle over medium heat.
  4. Add batter, about 2 T at a time (If you batter is thick, spread it out with a spoon. It will spread into a circle easily). Cook until the bottom of the pancake is set and the top is more opaque looking, not shiny. Flip, and cook another minute or two on the second side.
  5. Eat as is, or with additional maple syrup.

This recipe post is linked to the Gluten Free Wednesdays Carnival! Check it out at Gluten Free Homemaker, Easily Gluten Free, or Lynn’s Kitchen Adventures.

What I Ate Last Week #16

Welcome to this week’s post of Gluten Free Weekly Meals! Every week, I take photos of the gluten free recipes I make from all over the web and then share my thoughts. Throughout the week you can find pictures of what I’ve been eating on my Instagram (tastefullygf) and Twitter (@tastefullygf). Each Monday I post a list of my favorite gluten free meals from the last week. You’ll see my photos of the food, a link to the recipe, and any modifications I made. To see previous “Gluten Free Weekly Meals” posts, just use the search bar on the right side of the page. You can also find these recipes on my Pinterest boards. I hope these posts provide you with some gluten free cooking inspiration!

Breakfasts:

I’ve been counting on Baked Cookie Oatmeal and Toasted Coconut Baked Oatmeal the past few weeks. I wake up about an hour before I have to be at work, so every minute counts! I mix the wet ingredients in Pyrex bowls the night before, then add the dry ingredients in the morning and get dressed while the oatmeal bakes. I forsee a few new flavors of baked oatmeal in the near future, so that I have more flavor variety in my mornings. The picture below is the coconut version!

Toasted-Coconut-Baked-Oatmeal-WIALW16

Dinners:

As I scrolled through my food photos from this week I realized we had a lot of great food!

One of my favorite things right now are these Everything Bagel Quinoa Patties. We eat them with a whipped cheese spread that Steve makes, sort of based off this recipe. We ate the quinoa patties with zucchini noodles, spinach, and chicken. Yes, I did base the meal around the quinoa patties, not the meat/veggies! This particular zucchini noodle recipe is a concatenation of a few favorite recipes so I don’t have any easy link for it, but you can at least see how I make and cook zucchini noodles here.

Zucchini-Noodles-and-Chicken-With-Quinoa-Patties-WIALW16

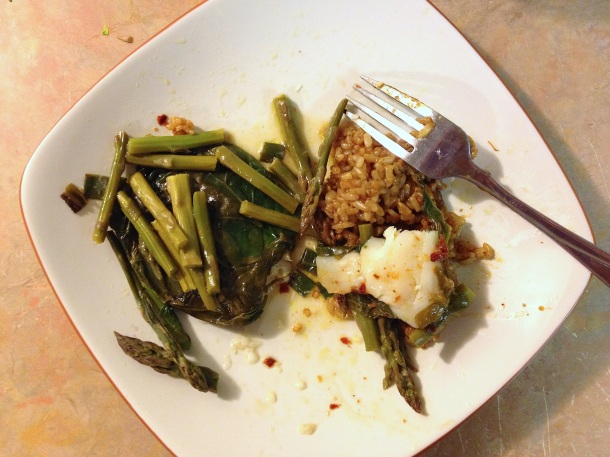
Another delicious dinner was this Spicy Lime Tilapia. I pinned this a long time ago, and make it whenever I want a super simple dinner. This is uber healthy, and cooks in foil packets. All you’ll have to wash are your plates and silverware, and if you eat out of the foil packets that leaves you with even less dishes! To up the calorie count a bit (I know, it sounds weird, but no carbs leaves us hungry later) I made a bit of spicy brown rice. It was a strange combination of spices (creole seasoning +  Penzey’s chili con carne seasoning) but I enjoyed it! (Sorry about the terrible picture – I took this after eating most of my meal!)

Spicy-Lime-Tilapia-WIALW16

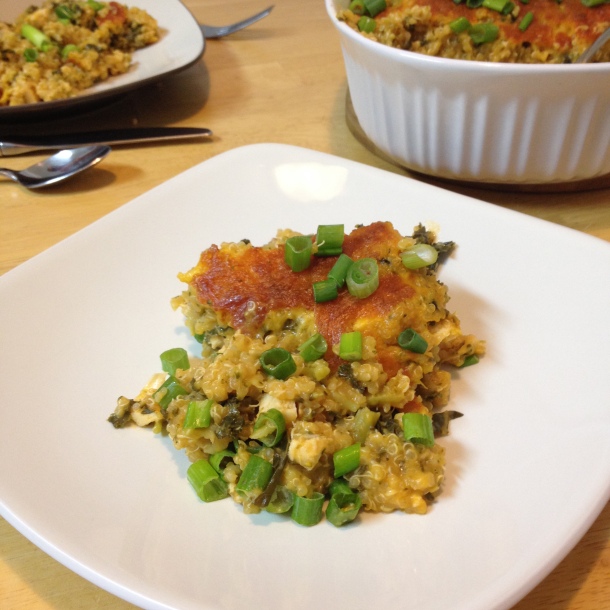
Another great meal is this Buffalo Chicken Quinoa Casserole. Or some title like that. The recipe is here at Half Baked Harvest (I made one of her recipes last week, too, oddly enough)! This is yummy. Just sub the 1 tablespoon of flour for a GF all purpose flour. Oh, and when I made the sauce I left out the 1/4 c butter. Still delicious.

Buffalo-Chicken-Quinoa-Casserole

On Saturday I made one of my seriously favorite foods ever: Spanikopita! Okay, so it was not the real, authentic Greek version with layers of buttery filo dough, but it was full of spinach, dill and feta cheese. I just used a “secret ingredient” in place of the filo dough. Many of you can probably guess by looking at the picture! The swap isn’t perfect, but it is so much better than never eating spanikopita at all! The recipe will be up in a couple of weeks!’

Gluten-Free-Spanikopita-Casserole-WIALW16

Last but not least is Honey Glazed Salmon with Brown Butter Lime Sauce from Cooking Classy. I’d had this pinned for a few months but hadn’t tried it yet. I’m so glad I did. Let’s just say that Steve was talking with his coworkers about how to get cheaper salmon so we could eat this more often. Served with steamed broccoli, rice, and corn on the cob it was still a simple meal with plenty of flavor.

Honey-Glazed-Salmon-with-Brown-Butter-Lime-Sauce-WIALW16

Have a wonderful week filled with lots of tasty gluten free food!

Buffalo Chicken Spaghetti Squash

A creamy, health-ified buffalo chicken mixture served on top of roasted spaghetti squash. A great, nutritious way to enjoy buffalo chicken for dinner!

Buffalo-Chicken-Spaghetti-Squash-Front

For the past ten minutes I’ve been killing time on the internet, trying to figure out how to adequately express that this is just the best meal ever. I mean, I’m a food blogger, ideally everything I post should be perfect and delicious. Will anyone really believe me if I say this is the best food you’ll ever eat?

Buffalo-Chicken-Spaghetti-Squash-Square

And then I thought I could convince you by telling you how often we eat Buffalo Chicken Spaghetti Squash (like, once a week) and how much time I spent trying to take photographs that would show just how mouthwatering it is (3 photoshoots).

I remembered that part of what is so great about this dinner (heck, I’d eat it for breakfast) is that it is healthy, guilt free, and made with good-for-you ingredients. Maybe that is the biggest selling point?!

Buffalo-Chicken-Spaghetti-Squash-Close

As with any food though, flavor matters! Made with the best hot sauce ever, Frank’s Red Hot (or use whatever your favorite is, no hard feelings!) this is as spicy as any buffalo chicken flavored item out there, with a kick of ranch flavor. The creamy buffalo sauce will cover the chicken and spaghetti squash so each mouthful is full of buffalo taste. If you’ve been reading this blog much you know I’m not a huge fan of leftovers and repeat meals, but I ALWAYS want these leftovers the next day!

I hope by now you’re convinced that this may in fact be the best meal ever. Please, try it for yourself, and let me know!

Buffalo-Chicken-Spaghetti-Squash-Tall

Buffalo Chicken Spaghetti Squash

Ingredients
  • 2 boneless, skinless chicken breasts, or 5 chicken tenderloins (this amount does not need to be exact. Also, feel free to skip step 3 and add any cooked cubed or shredded chicken you have on hand)
  • 1 c plain greek yogurt
  • 1/2 c Frank’s Red Hot Sauce (if using a wing sauce, increase to 2/3 c), or more/less to taste
  • 2 T dry ranch seasoning (use a homemade version or make sure the variety you choose is GF)
  • 1 c shredded cheddar cheese (and, honestly, this is delicious without cheese)
  • 2 small spaghetti squashes
  • sliced green onions, for garnish
Directions
  1. Preheat the oven to 400° F.
  2. While the oven is preheating cut the spaghetti squashes in half. I use a long serrated knife, start in the middle, and take my time working my way around the squash. Scoop the seeds out of the squash and discard. Place the squash halves cut side down on a baking sheet (I always put mine of a silpat mat) and bake for 30 – 50 minutes. Different size squashes need different cooking times. I always start checking mine for done-ness at the 30 min mark.
  3. While the squash is cooking, trim any fat off of the chicken. Place it in a saucepan with water and bring to a boil. Reduce heat to medium high and keep a low boil until the chicken is cooked through, about 10 – 15 minutes depending on the thickness of your chicken pieces. Remove the cooked chicken from the pan and let cool on a plate. Once it has cooled a bit, use two forks to shred it.
  4. Add the greek yogurt and hot sauce to a small sauce pan. Heat over medium heat. When the greek yogurt has “melted” add the ranch seasoning and stir to combine. Stir in the shredded chicken  and remove from the heat.
  5. When the spaghetti squash is cooked use a fork to scrap the “spaghetti” strands off the walls of the squash. Top each squash half (filled with the spaghetti squash strands) with 1/4 of the buffalo chicken mixture and sprinkle each with 1/4 c cheese.
  6. Place the spaghetti squash back in the oven and cook for another 5 – 10 minutes, or until the cheese melts.
  7. Garnish with sliced green onions and enjoy!
Serve this with
  • I serve this as a complete meal. If you’re looking to add something to the meal, a salad, corn on the cob, or a roasted vegetable would be great choices!

What I Ate Last Week #15

Posted on

Welcome to this week’s post of Gluten Free Weekly Meals! Every week, I take photos of the gluten free recipes I make from all over the web and then share my thoughts. Throughout the week you can find pictures of what I’ve been eating on my Instagram (tastefullygf) and Twitter (@tastefullygf). Each Monday I post a list of my favorite gluten free meals from the last week. You’ll see my photos of the food, a link to the recipe, and any modifications I made. To see previous “Gluten Free Weekly Meals” posts, just use the search bar on the right side of the page. You can also find these recipes on my Pinterest boards. I hope these posts provide you with some gluten free cooking inspiration!

This is my first WIALW (What I Ate Last Week) post in my new format. Instead of listing all of my breakfast, dinners, and sometimes lunches, I’ve just picked out the highlights for you. To read about why I made this change check out this post.

Let’s start with some breakfasts from this week!

First up is this Almond Joy Oatmeal. I take basic chocolate oatmeal (see recipe here) and stir in some almond extract at the very end of the cooking time. I’m a huge fan of the almond/chocolate combo! This oatmeal isn’t photogenic, but it is delicious! Although I didn’t do this last week when I took this photo, this oatmeal is great topped with a bit of coconut.

Almond-Joy-Oatmeal-WIALW15

Next up for breakfast is this Bacon, Hash Brown, and Egg Skillet. I made this for brunch Saturday, but I’ve made it a few times before. I use a combination of sweet potatoes and white potatoes for the hash brown portion. Once the hash browns and bacon have cooked on the stovetop I crack some eggs and cheese on top and pop it in the oven for a few minutes to cook the eggs. It’s a bit too involved for a weekday morning breakfast, but great for a weekend, brunch, or breakfast for dinner!

Bacon-Hashbrown-Egg-Skillet-WIALW15

My lunches this past week were all dinner leftovers from the night before. I tend to hate repeats, but eating something is always better than eating nothing.  I always plan to make enough food so that we have leftovers to become lunches!

Onto the dinners!

Tuesday’s dinner was a “mystery sauce” stir fry made by my husband. He used to make these all the time before we got married. It was always some meat and veggies with a 5 ingredient sauce, concocted from random ingredients in the refrigerator. This particular day’s sauce mix was taco-esque. As you can see, we ate it with rice. And if you’re wondering what those weirdly shaped green things are it is broccoli stems – sliced and cooked just like the florets. We’re against food waste here!

Mystery-Stir-Fry-WIALW15

By the weekend I was really desiring to do some more involved cooking, so I tried these burgers from Half Baked Harvest. And . . . I totally messed them up. I must have read the directions wrong or something, because the bean burgers were super wet and liquidy before cooking. I could hardly form them into patties! But, these burgers make this post this week because, despite my errors in cooking, they were delicious! I didn’t serve the burgers with buns because of the whole GF things, so we just had everything separately, garbage plate style (people know what that means, right?!). Steve didn’t think the burgers needed the sauce but I thought the Buffalo Cheese sauce was amazing! Don’t skip it!

Bean-Burgers-Fries-WIALW15

The last meal on today’s list is Spaghetti Squash with Sausage, Spinach, and Sage. Lot’s of S’s in that title! This dinner really accidentally came together and it was delicious. Don’t you love when that happens?  I made sure to take a few pictures so I can post the recipe on the blog!

Spaghetti-Squash-Spinach-Sausage-WIALW15

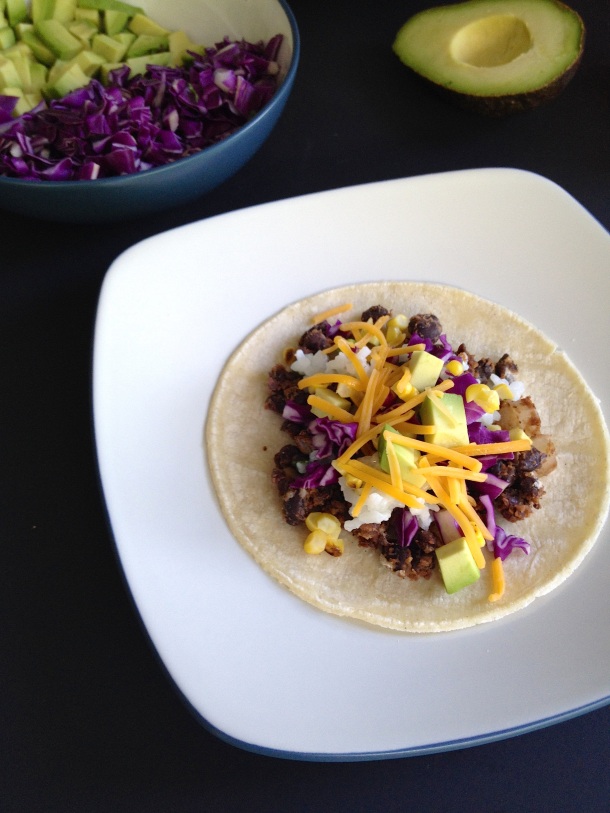
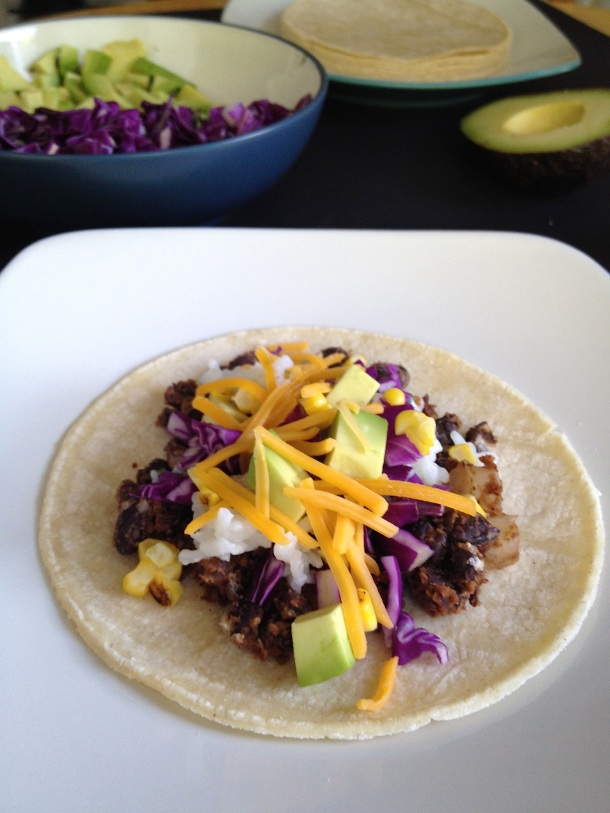
Mashed Black Bean Fajitas with Grilled Corn, Avocado, and Cabbage

Posted on

Black bean, vegetarian fajitas packed with veggies. Easily made gluten free using corn tortillas. Cooks up in under 30 minutes!

Black-Bean-Fajitas-Front

Last week I shared a method for cooking your own dry beans. It takes a while, but the effort is minimal. Once the beans are cooked they are as effortless to use as canned beans. I generally store mine in Ziploc bags in the freezer. Just thaw and use! If you store cooked beans in the refrigerator then there’s one less step (just remember that your beans will last longer in the freezer, so use them up before they go bad if you store them in the fridge!). With no prep required, beans make an excellent last minute meal!

Which is exactly how these fajitas started. I had meat in the house, but none that wasn’t frozen. There was a bunch of random stuff in the refrigerator, which I’m sure everyone reading this who is also a human being understands. Why is it that despite my best intentions, there are always odds and ends left in the refrigerator? I do my best to combat it. I look in the refrigerator and freezer before making a meal plan or grocery list. I open it when going to eat a snack. I try to utilize everything in there, but inevitably, there are still odds and ends.

Black-Bean-Tacos-Over

So, I gathered all my odds and ends from the refrigerator and prepared them while I sauteed some onions and black beans. The bean and onion mixture seemed bland so I added some lime juice and fajita seasoning. I used one of my new found favorite spices, Penzey’s Fajita Seasoning. I only found and had the chance to visit my first Penzey’s a few months ago and I am already a convert. Their spices make all my food taste amazing! What I love is that there is so much flavor in their spice blends. I can use less to get a great taste, and many don’t even have salt in them (although, I do love the 4S Smoky Salt). Of course, there are other fajita seasonings on the market, so just sub in whatever variety you can find and/or enjoy. In a pinch, taco seasoning will work!

Black-Bean-Tacos-Tall

Even though there is some dicing and chopping required, this is easily a 30 minute dinner. A healthy 30 minute dinner, at that! To make things even quicker you could use frozen or canned corn – also a great option for when you don’t want to grill in the winter! If you totally love cooking, there’s a variation for you, too! Try making your own tortillas. When I want something quick and convenient I use store bought corn tortillas, but there’s nothing quite like Mexican food with homemade tortillas. There’s a link in the recipe below with directions on how to make your own tortilla.

Black-Bean-Fajitas-Close

Save this recipe, and next time you’re in a pinch and need a quick, healthy, dinner, give these fajitas a try! I know that to some of you no gluten and no meat may sound like a drag, but I bet by the end of the meal you won’t be missing either!

 Mashed Black Bean Fajitas with Grilled Corn, Avocado, and Cabbage

Ingredients
  • 2 tsp olive oil (or any oil that you regularly use)
  • 1 small onion, diced
  • 1 can rinsed and drained, or 2 c cooked black beans
  • 2 tsp fajita seasoning (I use Penzey’s)
  • 1 1/2 Tbs lime juice (or juice from 1 lime)
  • 1 ear corn
  • 1/2 c diced red cabbage
  • 1/2 avocado, cut into bite sized pieces
  • 1/4 c shredded cheddar cheese
  • 10 corn tortillas (here’s a recipe to make your own corn tortillas)
Directions
  1. Preheat the grill. Husk the corn, and lay it on the grill in direct heat. Turn it every 2 to 3 minutes, until charred on all sides.
  2. Heat the olive oil in a large skillet over medium heat.
  3. When the oil is warm, add the onions. Stir frequently, until the onions are softened.
  4. Stir in the beans.
  5. Add the lime juice and fajita seasoning. Stir to combine. Using a fork, gently mash the beans.
  6. Serve hot with the cabbage, avocado, and cheese. If using store bought corn tortillas, microwave a small stack (3 – 5) of tortillas for about 30 seconds to soften them.

 Serve this with

This post is linked to Gluten Free Wednesdays hosted by Gluten Free Easily, Lynn’s Kitchen Adventures, and Gluten Free Homemaker. Check it out! Tons of recipes there!

Happy Labor Day!

Posted on

I’m interrupting my regular blog programming to wish you all a Happy Labor Day!

I’m most likely going to be kicking back at the beach today, enjoying my first day of paid vacation with my new job! Yay yay!

If you’re looking for some gluten free cook out recipes, check out this grilling recipe round up I posted earlier this summer.

Grilling Recipes

If you’re going for a more lazy holiday here are some super easy recipes to get your cooking fix without much effort:

Vanilla Chocolate Chip Yogurt Pops

Vanilla-Chocolate-Chip-Yogurt-Pops-Front

Best Ever Kettle Corn

IMG_4771

Black Bean Quesadillas with Spicy Yogurt Sauce

2013-12-07 16.01.35

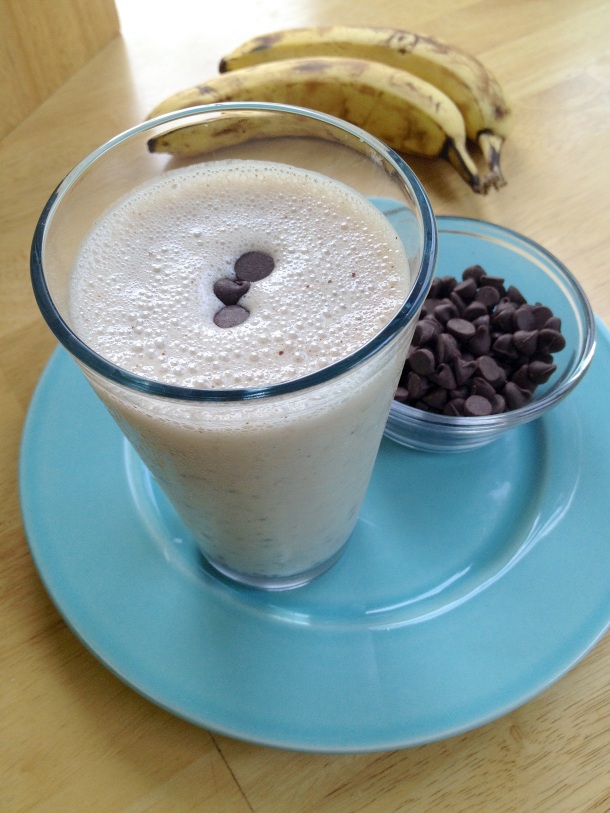
Banana Chocolate Chip Smoothie

Banana-Chocolate-Chip-Smoothie-Tall

Happy Labor Day everyone!

Enjoy your day off and the 4 day work week!


How To: Cook Dry Beans

Posted on

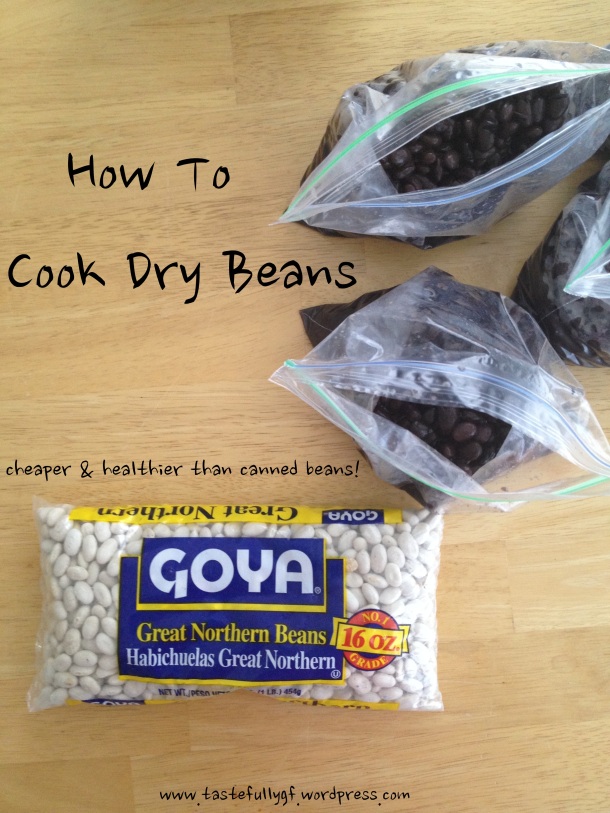
How-To-Cook-Dry-Beans

Several months ago I started paying more attention to the labels on the canned goods I was buying. After hearing all sorts of bad things about ingredients like BPA and Carageenan I decided I needed to know more about what I was putting into my body.

Beans, which are generally considered a healthy food, had some shocking ingredients! I was amazed at the amount of added sugar and salt in just one can of beans. Maybe I was naive, but I’d always figured beans were just, well, beans. I was wrong!

Considering my options, I knew buying the organic, all natural, BPA free canned beans wasn’t an option for me. They are quite expensive and difficult to come by where I live.

So, I started investigating dry beans. They seemed to be cheap, and the only thing in the bag was beans. Every grocery store I shop at also has an ample selection of dried beans.

I started researching how to use dry beans in cooking and was shocked at how little information I found. In recipe ingredient lists beans are almost always measured by the can. I found a few recipes that referenced using your own cooked beans, but nothing much about actually cooking them. I tried following the package directions from a bag of black beans, but the beans were just too hard. I continued researching, picking up tidbits of information here and there, experimenting with different methods along the way, and finally came up with a consistent method for cooking beans. None of this is something special that I have come up with, rather, a compilation of information I have gleaned from many sources, all of which has been tested in my kitchen!

Aside from what I already mentioned (cost, food additives), I have not noticed a big difference in switching from canned to cooked beans. Beans that I have cooked seem to be a bit smaller than their canned counterparts. Many people talk about how amazing freshly cooked beans taste, compared to ones from a can. To be honest, I haven’t noticed a big difference, but I tend to add beans to dishes that already have a lot of flavor, like tacos and chili. If you are used to canned beans you may find home cooked beans need a bit of salt.

I’ve used this cooking method for a whole variety of beans with success. Cooking your own beans takes some planning, but the hands on effort is next to nothing. Much of the process happens while you sleep! After an initial soak there’s a cooking option for using the stove top or a slow cooker.

Use-Dried-Beans-Instead-Of-Canned-Beans

 
Step 1:

Open the bag of beans and sort them. What does sorting mean? Simply, take out anything that isn’t a bean. Occasionally you’ll find a small stone, a bean of a different variety, or just a misshapen bean. Just throw these away (or compost them). You will find beans that look a bit dirty but don’t discard these. Part of the cooking process involves rinsing, so you don’t need to worry about ingesting the dirt. As you sort the beans, place all the good beans in a large bowl that you have a lid for.
Step 2:

Take the bowl of sort beans and fill it with water. You’ll need to add enough water to completely cover the beans, plus a few extra inches. Put the cover on the bowl of soaking beans and let it sit in the refrigerator overnight.

Step 3:

After the beans have soaked overnight you’ll want to rinse them. Just dump the entire contents of the bowl into a large strainer. Run water over the beans until the liquid coming out of the bottom is clear.

Step 4: Stove Top Option

Add the rinsed beans to a large pot and fill this with water. Similar to the soaking, you’ll need enough water to cover the beans plus a few extra inches on top of the beans. Bring the pot to a boil, and then reduce the heat so that it stays at a simmer. Watch during the cooking to make sure the water doesn’t run low. If you see beans sticking out above the water, just add more. You’ll probably notice some foam forming, you can use a spoon to scoop this out, if desired. Let cook until the beans are tender. I test by poking with a fork and seeing how easily it goes in, or with a taste test. Cook time is 1 to 2 hours, depending on the bean variety.

Step 4: Slow Cooker/Crock Pot Option

Add the rinsed beans to a slow cooked and fill the slow cooker with water. Similar to the soaking, you’ll need enough water to cover the beans plus a few extra inches on top of the beans. Turn the crock pot to high heat. As the beans cook, watch to make sure the water doesn’t run low. If you see beans sticking out above the water, just add more. You’ll probably notice some foam forming, you can use a spoon to scoop this out, if desired. Let cook until the beans are tender. I test by poking with a fork and seeing how easily it goes in, or with a taste test. Cook time is 1 to 2 hours, depending on the bean variety.

Using/Storing Cooked Beans

Once your beans are cooked, you can use them as you would any canned beans! Use about 2 cups of your cooked beans in place of one 15 oz can of beans. Cooked beans that you aren’t going to use within a few days can be frozen.

I plan to write another post with more of the specifics about using canned beans in recipes. For the time being, this should be enough to get you started on the path to replacing you canned beans with home cooked beans. If you have any questions about how to do this, please leave me comment for me to answer, or shoot me an email, facebook message, etc.

I hope you give this a try, and see for yourself how easy it is to cook your own beans at home! Keep an eye out next week for a new gluten free, vegetarian recipe you can use freshly cooked beans for!