RSS Feed

Tag Archives: sweet

Pumpkin Oatmeal & Big News!

Posted on

I’ve been working on a big project. It’s an eBook! Specifically, a GF Christmas cookie eBook!

I’ve been baking dozens and dozen of cookies, taking lots of photos, and learning to use iBooks Author. The eBook will have a couple of naturally GF, flourless cookie recipes along with a collection of traditional Christmas cookie recipes reworked to make a portion of the batch with GF flour and portion with wheat flour.

I still have some work to do on the eBook, but it will be completed in December, in time for your holiday baking, or to give to a GF friend as a holiday gift! If you’d like to receive a few email updates about the eBook (when I launch it, when it is available on the Kindle and iBooks Store, etc) click here to sign up for the updates. Everyone who signs up for the email updates will also be entered in a contest to receive a free copy of the eBook! So, sign up for those emails here! I promise I won’t spam you in any way!

Now, onto today’s recipe: Pumpkin Oatmeal!

I LOVE pumpkin. Pumpkin pie, pumpkin muffins, pumpkin spice drinks, I’ll take them all! I was pretty excited to add some pumpkin to my oatmeal and see what kind of delicious, pumpkin flavored breakfast I could get. It took a few tries, but I did eventually come up with something I was happy with.IMG_6303

This oatmeal is sweetened with honey. I use a teaspoon, but you may have to adjust according to your tastes. This is yummy plain, topped with chopped nuts, or chocolate chips. Really, try the chocolate chips, even if you like it plain. Pumpkin + chocolate is a winning combination!

IMG_7696


Pumpkin Oatmeal

Ingredients
  • 1/3 c Gluten free oats
  • 1/3 c almond milk (or other milk of choice)
  • 1/3 c water
  • 3 Tbs pumpkin puree
  • 1 tsp honey
  • Optional: Chopped nuts for topping
  • Optional: Chocolate chips for topping
Directions
  1. In a small saucepan bring oats, almond milk, and water to a boil.
  2. As soon as the liquid begins boiling stir and turn the heat down to medium-low.
  3. As the oats are cooking stir every once in a while to prevent sticking to the bottom of the pan. When most of the liquid has absorbed stir in the pumpkin puree, followed by the honey.
  4. Continue cooking until the oatmeal reaches your desired consistency.
  5. Eat plain, or top with chopped nuts or chocolate chips.

Gourmet Turkey Burgers: Sweet Thai Burgers

Posted on

IMG_4555

I thought food blogging would be easy. Creative cooking is one of my talents. I figured I’d just snap a few photos before each meal and then post them online with the recipe. Yeah, it’s not that simple. The recipe development comes naturally to me but the photography, not so much.

Lets take these burgers for example, which I have tried to photograph now on two occasions. Luckily, they are really good, so we haven’t minded having them a few weeks in a row.

The first round of photographs went badly all due to my hungry and lack of patience. I was a little lazy and just wanted to eat my dinner. And warm. After taking pictures for half an hour the burger is only lukewarm and the cheese is not melt-y anymore. That takes half the fun out of a cheese burger. So, I gave in to my taste buds after about a dozen photos, most of which turned out poorly.

IMG_4549

Second photo shoot, I was totally prepared. Like, I ate a snack while I was cooking so that I would have the patience to get through taking the pictures without getting hungry and frustrated. Well, I’m grilling the burgers and it starts raining and storming. We have a tarp hanging up on the deck to keep the grill area dry, so that was fine, but it was DARK. And this is what happens when you try to take pictures in the kitchen with a really crappy artificial light instead of using natural light:

Now, pretend you never saw that!

So, my other pictures of these burgers are not quite as awful as that one, but didn’t turn out as well as I’d hoped for, either. I’m sorry. I hope you try them, anyway!

Moving past the photography and onto the food (that is what we’re all here for, right?), these burgers I’ve been having such a hard time capturing on film are pretty darn tasty. As a GF person, who rarely eats a burger with a bun, I feel pretty strongly about having a burger that is so delicious that I won’t even miss not being able to have the bun. These burgers fit the bill perfectly. With one pound of ground turkey, an onion, 2 seasonings, and 20 minutes of time you get a mouthwatering dinner that is naturally GF. You will enjoy these Thai burgers with or without a GF hamburger bun!

IMG_4551

Gourmet Turkey Burgers: Sweet Thai Burgers

 
Ingredients (makes 6 burgers)
  • 1 lb. ground turkey (or ground beef or chicken)
  • 1 onion, chopped
  • 1 Tbs olive oil
  • 1/4 c Thai sweet chili sauce (check label to make sure its GF – I use the Maggi variety)
  • 2 Tbs chopped Thai basil leaves (or regular basil)
  • optional: GF hamburger buns (You can easily turn this into a PGF meal by having regular hamburger buns available for anyone who doesn’t need GF buns.)
Cooking Directions
  1. Heat the olive oil in a small skillet over medium heat. When the oil is warm, add the onions. Cook, stirring frequently, until the onions are soft.
  2. In a bowl combine the ground turkey sweet chili sauce, chopped basil and softened onions. Form into 6 patties.
  3. Grill the burgers for about 5-8 minutes on each side, until the internal temperature is 165°F.
  4. Serve plain or with additional sweet chili sauce, basil leave, and hamburger buns.

Best Ever Kettle Corn

Everyone who has ever eaten this kettle corn tells me that it is literally the best kettle corn they have ever had. Apparently it’s a cross between kettle corn and caramel corn, which together is somehow better than either one is on its own. I, however, cannot vouch for this because I have never even eaten one single piece of this kettle corn.

Is that horrible? Here I am telling you this is the best popcorn ever when I’ve never actually eaten it. Really, I’m just not a big enough sweet tooth to even want to try many dessert-y things. Sure, I like cookies and ice cream, but all of my favorite desserts have one commonality: chocolate. And even with chocolate in the mix I’d pick something savory over something sweet the majority of the time. So, how did I end up with best kettle corn recipe ever? Well, let me explain. . .

I love popcorn. Like, I could eat popcorn everyday. I did eat popcorn everyday until I got married and moved and forgot to bring my hot air popcorn popper with me. I tried a few microwave methods but nothing really worked. When I got my popcorn popper back I was happily eating popcorn again with only one problem: Steve apparently hates popcorn. It seemed impossible to me, but he said it was tasteless and horrible. Apparently, the only kind of popcorn he wants to eat is kettle corn. Considering my affinity for popcorn, you’d think that I would like kettle corn, but I don’t. Taco popcorn? Sriracha popcorn? Lemon Pepper & Dill popcorn? I’ve got you covered! But kettle corn . . . no way. I knew nothing about that sweet abomination of my favorite snack.

I tried to be a loving wife and make kettle corn for Steve anyway. It consisted of air popped popcorn, sprayed with olive oil and sprinkled with granulated sugar. Apparently, that’s not the real thing. But who was I to know that?

Fast forward a few months. In the middle of a batch of popcorn the motor of my hot air popper literally died. Oh, I was bummed. I tried microwave popcorn again, but I still wasn’t happy with it. Then, we decided to try stove top popcorn. I remembered making it as a child, in an old pan we’d gotten from a garage sale because my parents said the popcorn would ruin a good pan. I was nervous to ruin a pot, but Steve encouraged me. Sure enough, not only did the pot survive the popcorn making process, but the popcorn was SERIOUSLY DELICIOUS! I was hooked on stove-top popcorn, and decided to give kettle corn another try. For Steve, that is, because I surely wasn’t going to eat that disgusting sugary gross-ness. I did some research and learned about kettle corn making. Apparently it was a success, because Steve really liked it. He was bragging to all sorts of people about this kettle corn.

One day, a friend of his was over for grilled pizza, and go figure Steve was bragging about the kettle corn. I went to make some for the two of them, but my large popcorn serving bowl had just been hand washed and was sitting on the kitchen counter drying. I figured a few water droplets wouldn’t hurt anything, and prepared the popcorn in the bowl anyway. That water didn’t hurt the popcorn – it apparently made it better. I’ve since started added a bit of water to my kettle corn mix (rather than washing and half-drying a bowl each time I make kettle corn), and its still quite a success. Everyone who has eaten this has raved about it. I’m not making this up. I try to tell people it’s gross and to eat the salty popcorn instead, but everyone likes the kettle corn anyway! I don’t get it.

IMG_4798

As you can see, the kettle corn sticks together a bit, which apparently adds to its appeal.

That’s the end of my kettle corn story. I guess if you’re into kettle corn or sweets this might sound appealing to you, and if that’s the case I hope that you enjoy this variation very much! If not, then I suggest stove top popcorn with salt (and if you want to know how to make that let me know)!

IMG_4771

Best Ever Kettle Corn

 
Ingredients
  • 1/4c popcorn kernels
  • 2 Tbs canola oil (I’ve used olive oil, too)
  • 2 1/2 Tbs sugar
  • 1/2 Tbs water
  • salt
Cooking Directions
  1. Heat the oil in a large saucepan until it is very hot. You should be able to feel the heat coming up from pan and see the oil rippling (I do this with my stove on a 7 out of 10).
  2. While oil is heating, measure out the rest of your ingredients. You can combine the sugar and popcorn kernels if you want to conserve space/dishes, but keep the water separate!
  3. When the oil is hot, dump the popcorn and sugar into the pan and stir, quickly. The sugar and oil should combine to look like road slush (if you’re not familiar with snowy driving conditions then just ignore that). Cover.
  4. Now, pour in the water and cover IMMEDIATELY. The second the water hits the pan hot oil will go flying. I just lift the lid up a tiny bit, pour int he water, and shut  it right away.
  5. Now, shake the pan. You can lift it off the burner to shake or slide it back and fourth, still touching the burner. Just make sure to keep the popcorn. It may take a minute or two to start popping, or it may start popping right away (this will have to do with how fresh the popcorn is).
  6. When the popping has slowed transfer the popcorn into a bowl. Sprinkle with salt and stir.
  7. Let the kettle corn cool for a couple of minutes and then eat!

Lemon Bars with Almond Shortbread Crust (GF)

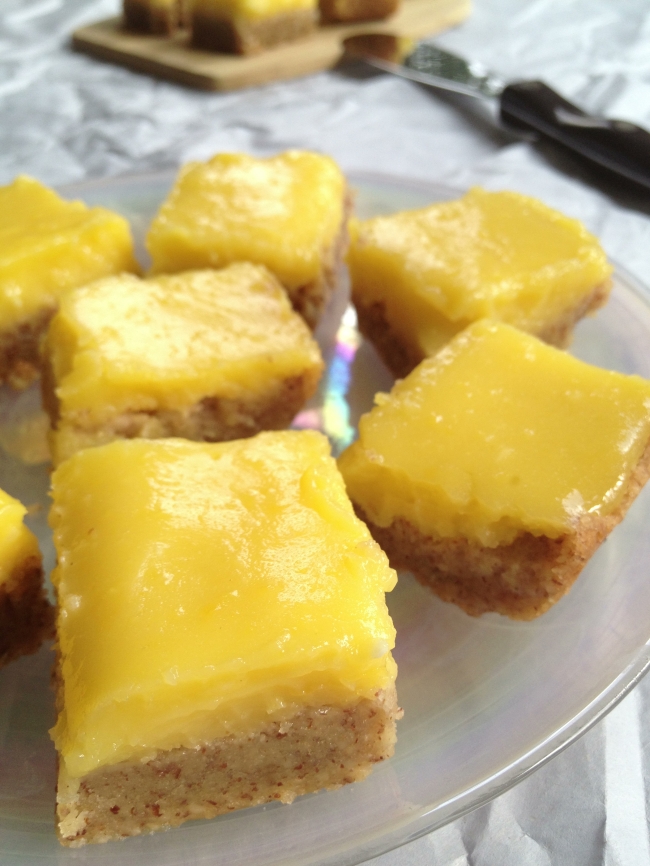
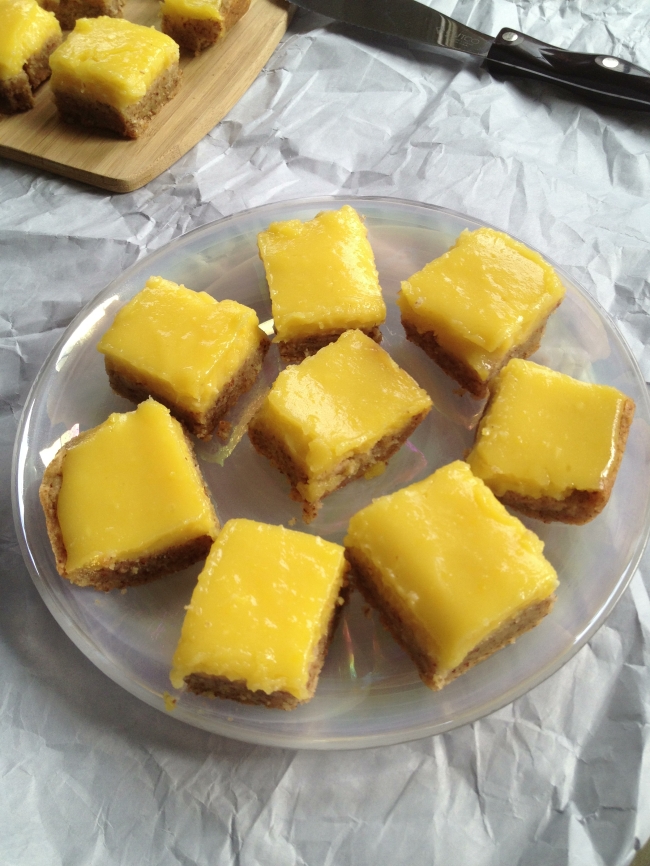
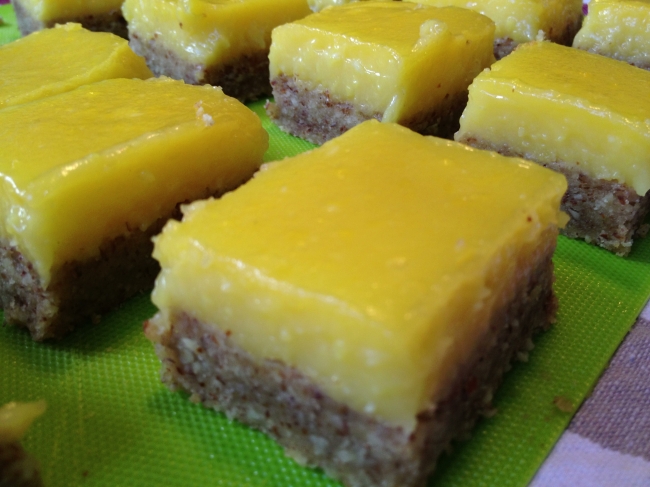
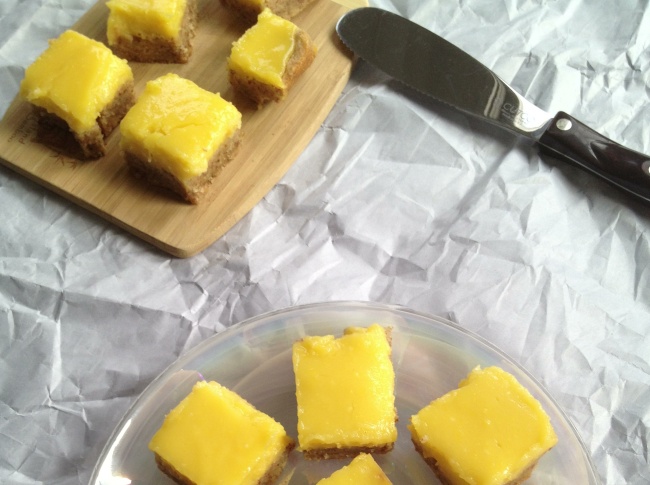
I first saw this recipe on The Kitchn a few months ago and I had a lot of fun creating a gluten free variation. I figured lemon bars would be the perfect dessert to have around on hot, summer days. Oh, and these were! Even as the weather has cooled down a bit these chilled bars are just as appetizing. It’s difficult to eat just one! The lemon curd is tangy, but sweet, and the almond shortbread is just out of this world. In fact, I love the almond shortbread so much that I increased the crust to lemon ratio.

ImageAlthough these bars are so delicious, they do require some time, effort, and patience to prepare. There’s juicing and zesting the lemons, making the shortbread crust, baking the shortbread crust, making the lemon mixture, baking it all again, and finally the bars cool and sit in the refrigerator for a few hours. Phew – it’s even a lot to type out!

Image

I had planned to make these bars yesterday, knowing I wanted to post about them today. I had nothing scheduled until the evening so I figured I could take my time and enjoy the baking process. My plan was foiled when I found out that the Apple Keynote was yesterday. Now, I am a huge Apple fanatic. I came from a family of Mac users, my husband is a Mac user. I think we have enough iDevices around to have one for each room of the house. The Apple Keynote is like Christmas for all of us. Except, instead of unwrapping a present we’re excitedly waiting to find out what new, cool electronics Apple has created for us now. We all gather around our respective computers, watch the live blogging of the event, texting back and fourth the entire time. So, at 12:03pm I set out to make these lemon bars, knowing that I needed to be at the computer for the Apple Keynote at 1:00pm. Could I actually complete all that baking in under an hour?

The answer was, almost, yes. By 12:30 the crust was mixed and baking and I was mixing up the ingredients for the lemon curd. The lemon curd finished cooking, the crust came out of the oven, I poured the lemon curd over the crust and popped it back in the oven for the final baking. It was exactly 1:00pm! I asked Siri to “set my timer for 10 minutes” and watched the Keynote until the timer went off. Then it was just a matter of sneaking to the kitchen for a second to pull the pan out of the oven. The rest of the process is just letting the lemon bars set and cool, which is all inactive.

Image

So, yes, this is a somewhat complicated recipe and it might look daunting (if you are anything like me, that probably excites you). If you choose to invest the hour of your time and a spot in your refrigerator to these lemon bars you will not be disappointed. Its a little more work than whipping up a quick batch of chocolate chip cookies, but the result is truly decadent.

ImageLemon Bars with Almond Shortbread Crust

(makes about 18 small bars)

Recipe adapted from: The Kitchn

Ingredients:

Crust
  • 3/4c butter (1 and 1/2 sticks)
  • 3/4c powered sugar
  • 1 3/4c almond meal
  • 1c GF all purpose flour (I used Bob’s Red Mill)
  • 1/2 tsp salt
Lemon Curd
  • 4 eggs
  • 4 egg yolks
  • 1c granulated sugar
  • 1/4 tsp salt
  • 2 Tbs butter
  • 5 lemons

Baking Directions:

  1. Preheat oven to 350° F.
  2. Zest and juice the lemons, saving both the zest and the juice.
  3. Mix the powdered sugar and the 3/4c butter listed in the crust ingredients together in a stand mixer. I used the paddle attachment on medium speed.
  4. When the butter and sugar are creamed together (looks like frosting) scrape down the bowl and add in the remaining crust ingredients and mix until combined.
  5. Line a 7 x 11 inch glass baking dish with either parchment paper or silpat. The edges might hang over, but that is fine. Press the crust firmly into the pan, spreading it evenly with your hands.
  6. Bake for 20 – 25 minutes, until the edges just start to brown.
  7. While the crust is in the oven, whisk together the eggs, egg yolks, and sugar in a medium sized saucepan.
  8. Stir in the reserved lemon juice and lemon zest (from step 2), and the salt.
  9. Heat over medium heat, stirring constantly. Watch for the mixture to thicken, it will take under 10 minutes.
  10. Immediately, when the mixture thickens, remove the saucepan from the heat. Strain the mixture to remove any clumps. This takes me a few minutes, and some stirring to get the liquid to keep moving through the strainer.
  11. Return the strained lemon mixture to the burner (which will still be warm, but off at this point) and add in the butter, stirring until it melts.
  12. Pour the lemon curd over the finished crust, spreading it out if needed.
  13. Place the baking dish back in the oven for another 10 – 15 minutes; however long it takes for the edges of the lemon curd to set.
  14. Let the lemon bars cool, and then place them in the refrigerator for a few hours before cutting and serving.

Sweet & Tangy Thai Chicken with Rice and Edamame

Posted on

Image

As a gardener, one of my dreams is to have huge, bushy basil plants. I LOVE to use fresh herbs in cooking. It’s so exciting to go outside, snip a few leaves off for tonight’s dinner, and be able to do the same thing tomorrow, and the next day, and the next day . . . 

This year I have three types of basil in my garden: Genovese, Lemon, and Thai. Each of my plants if huge! A gardener/cook’s dream come true! I’m taking every opportunity to use my fresh herbs. 

Image

My Thai basil plant that is providing me with tons of fresh basil!

So, Thai food is tasty. Wether it’s sweet or spicy that you desire, there is something in Thai cuisine for you. There’s a Thai restaurant nearby that we go to from time to time. They offer four levels of spiciness: mild, medium, American hot, and Thai hot. My husband will get something mild with a sweet sauce. I get my food American hot with garlic and soak up as much of the spicy sauce as possible with tofu. We obviously have different flavor preferences! 

As I’m exploring different ways to use my Thai basil I set out to create something we would both enjoy. This was definitely a hit. The rice and edamame is coated in a sweet Thai chili and peanut sauce. The chicken is marinated in spicy asian sauces. The combination was amazing. 

Image

The grilled chicken. I recommend using a flat, metal skewer, like this one.

I topped mine with . . . you guessed it . . . Thai basil! If you don’t have access to fresh Thai basil you can also get it in a jar some grocery stores. You can also sub in a more common basil.

ImageMy husband mixed his food all together and added some extra sweet chili sauce.

ImageNow, this recipe might seem daunting with all the different flavors and sauces. Think of it this way: You’ll mix up the chicken marinate the night before. It’ll be quick. When you are ready to make the rest of the meal, you will already have some of the work already done. The rice and edamame cook in the same pot, so you’ll just mix the sweet chili sauce and grill the chicken while it’s simmering. I promise; the flavors are worth the effort!

ImageSweet & Tangy Thai Chicken with Rice and Edamame

Ingredients
Marinade:
  • 1 tsp chili garlic paste (or more, to taste)
  • 2 Tbs lime juice
  • 2 Tbs fish sauce
  • 2 cloves garlic, minced
  • 1/2 tsp crushed red pepper (or more, to taste)
  • 2 shakes cayenne pepper

Sweet Chili Sauce

  • 1/2 tsp sugar substitute or 1 Tbs sugar
  • 1/2 tsp ginger, minced
  • 1/2 tsp garlic powder
  • 1 tsp peanut butter
  • 1 1/2 Tbs lime juice
  • 1 Tbs milk
  • 1/2 Tbs distilled white vinegar
  • 2 Tbs sweet chili sauce


  • 3 chicken breasts, cut into bite sized pieces
  • 1c brown rice
  • 2c water
  • 1c edamame (I used frozen)
  • 1/4c cilantro, chopped
  • 1/4c thai basil, chopped
  • 1 bunch of green onions, top half, chopped
Cooking Directions:
  1. Mix marinade ingredients. Add chicken chunks to marinade and refrigerate overnight.
  2. Mix the sweet chili sauce, and chop the cilantro, Thai basil, and green onions if you haven’t already done so.
  3. Bring the rice and water to a boil in a large saucepan. When it boils, reduce heat to low and cover.
  4. While rice is cooking, skewer the chicken (I use flat metal skewers) and grill. I use a gas grill, between 350°F and 400°F. It takes a few minutes on each side to cook through).
  5. When rice has nearly absorbed all of the water, stir the edamame into the pot.
  6. When rice is fully cooked, stir in cilantro, Thai basil, green onions, and the sweet chili sauce you mixed.
  7. Serve with the grilled chicken. Top with additional herbs or sweet chili sauce, if desired.