RSS Feed

Tag Archives: dinner

Mashed Black Bean Fajitas with Grilled Corn, Avocado, and Cabbage

Posted on

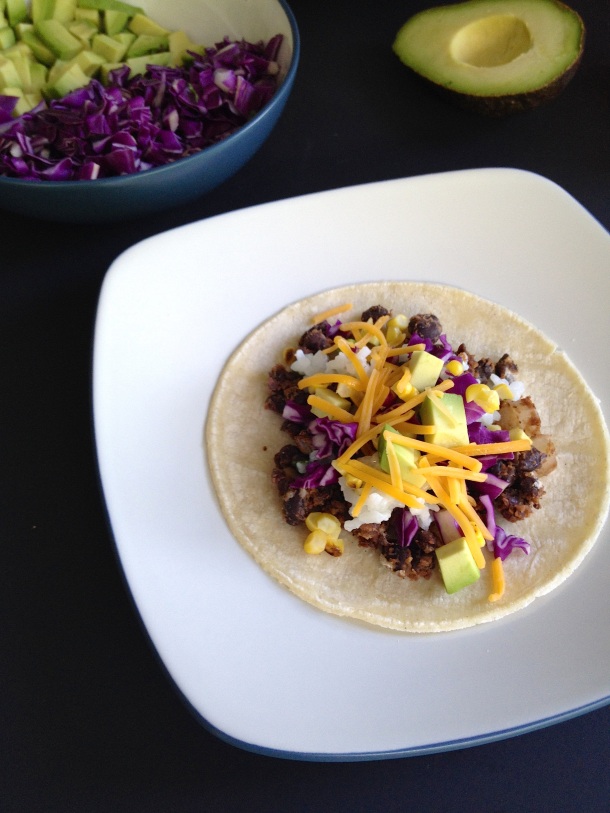
Black bean, vegetarian fajitas packed with veggies. Easily made gluten free using corn tortillas. Cooks up in under 30 minutes!

Black-Bean-Fajitas-Front

Last week I shared a method for cooking your own dry beans. It takes a while, but the effort is minimal. Once the beans are cooked they are as effortless to use as canned beans. I generally store mine in Ziploc bags in the freezer. Just thaw and use! If you store cooked beans in the refrigerator then there’s one less step (just remember that your beans will last longer in the freezer, so use them up before they go bad if you store them in the fridge!). With no prep required, beans make an excellent last minute meal!

Which is exactly how these fajitas started. I had meat in the house, but none that wasn’t frozen. There was a bunch of random stuff in the refrigerator, which I’m sure everyone reading this who is also a human being understands. Why is it that despite my best intentions, there are always odds and ends left in the refrigerator? I do my best to combat it. I look in the refrigerator and freezer before making a meal plan or grocery list. I open it when going to eat a snack. I try to utilize everything in there, but inevitably, there are still odds and ends.

Black-Bean-Tacos-Over

So, I gathered all my odds and ends from the refrigerator and prepared them while I sauteed some onions and black beans. The bean and onion mixture seemed bland so I added some lime juice and fajita seasoning. I used one of my new found favorite spices, Penzey’s Fajita Seasoning. I only found and had the chance to visit my first Penzey’s a few months ago and I am already a convert. Their spices make all my food taste amazing! What I love is that there is so much flavor in their spice blends. I can use less to get a great taste, and many don’t even have salt in them (although, I do love the 4S Smoky Salt). Of course, there are other fajita seasonings on the market, so just sub in whatever variety you can find and/or enjoy. In a pinch, taco seasoning will work!

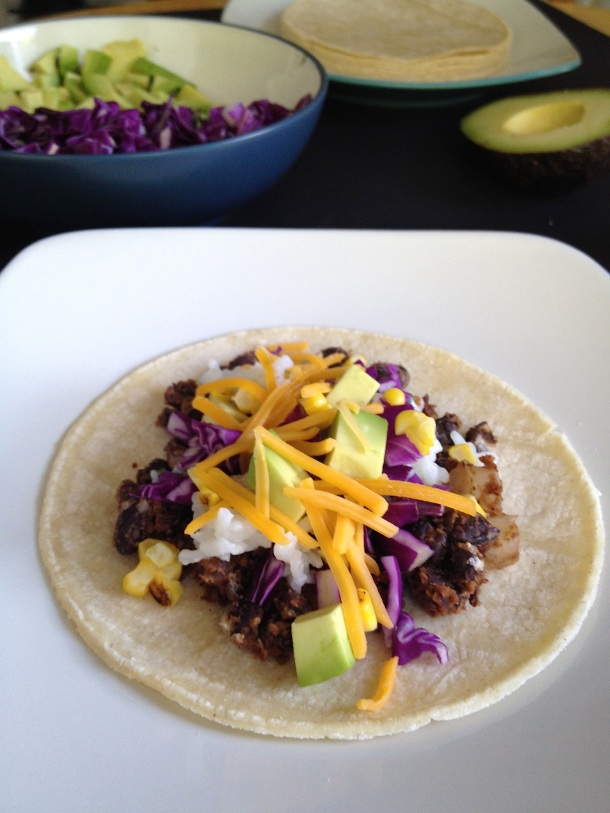
Black-Bean-Tacos-Tall

Even though there is some dicing and chopping required, this is easily a 30 minute dinner. A healthy 30 minute dinner, at that! To make things even quicker you could use frozen or canned corn – also a great option for when you don’t want to grill in the winter! If you totally love cooking, there’s a variation for you, too! Try making your own tortillas. When I want something quick and convenient I use store bought corn tortillas, but there’s nothing quite like Mexican food with homemade tortillas. There’s a link in the recipe below with directions on how to make your own tortilla.

Black-Bean-Fajitas-Close

Save this recipe, and next time you’re in a pinch and need a quick, healthy, dinner, give these fajitas a try! I know that to some of you no gluten and no meat may sound like a drag, but I bet by the end of the meal you won’t be missing either!

 Mashed Black Bean Fajitas with Grilled Corn, Avocado, and Cabbage

Ingredients
  • 2 tsp olive oil (or any oil that you regularly use)
  • 1 small onion, diced
  • 1 can rinsed and drained, or 2 c cooked black beans
  • 2 tsp fajita seasoning (I use Penzey’s)
  • 1 1/2 Tbs lime juice (or juice from 1 lime)
  • 1 ear corn
  • 1/2 c diced red cabbage
  • 1/2 avocado, cut into bite sized pieces
  • 1/4 c shredded cheddar cheese
  • 10 corn tortillas (here’s a recipe to make your own corn tortillas)
Directions
  1. Preheat the grill. Husk the corn, and lay it on the grill in direct heat. Turn it every 2 to 3 minutes, until charred on all sides.
  2. Heat the olive oil in a large skillet over medium heat.
  3. When the oil is warm, add the onions. Stir frequently, until the onions are softened.
  4. Stir in the beans.
  5. Add the lime juice and fajita seasoning. Stir to combine. Using a fork, gently mash the beans.
  6. Serve hot with the cabbage, avocado, and cheese. If using store bought corn tortillas, microwave a small stack (3 – 5) of tortillas for about 30 seconds to soften them.

 Serve this with

This post is linked to Gluten Free Wednesdays hosted by Gluten Free Easily, Lynn’s Kitchen Adventures, and Gluten Free Homemaker. Check it out! Tons of recipes there!
PGF: Pesto Chicken & Lemon Kale Sandwiches

Posted on

n-Lemon-Kale-Sandwiches-1

Pesto Chicken & Lemon Kale sandwiches make a quick and healthy meal. These warm, toasted sandwiches can be made with GF or wheat bread. Perfect for a group of people who have differing dietary needs. The lemon and pesto combination is irresistable. Whether you are eating GF or not you will love this sandwich!

I really enjoy eating soup. There’s nothing else like a tomato soup and grilled cheese, and any time I feel sick with anything I make Avgolemono Soup. I have a whole pinterest board just for soups I want to try!

Soup is a cold weather food. The last thing you want to do on a hot day is eat a big bowl of steaming soup. Hot days are the majority here, so as summer approaches I’ve been trying to get my fill of soups.

A few weeks ago, when the temperature starting getting into the 70s, I kind of freaked out about all the soup recipes I wanted to try and hadn’t had the chance yet! There was one soup in particular that I was anxious to try so I planned to make it that very night. I needed something a little more substantial to go with the soup so I invented these sandwiches out of ingredients from my refrigerator.

Pesto-Chicken-Lemon-Kale-Sandwiches-2

The soup, sadly, wasn’t that great but the sandwiches were awesome! The lemon flavored kale and pesto go together strikingly well. As someone who usually eats all of my foods separated I was honestly a little worried, but the sandwich was 100% enjoyable. The tastes and textures all blended together perfectly. Even the GF bread was perfect. It browned and crisped up so much better than the sandwiches I made on wheat bread for Steve.

Pesto-Chicken-Lemon-Kale-Sandwiches-3

Before actually putting together these sandwiches you’ll need to cook some chicken and saute some kale. It sounds like a lot of work for a sandwich, I know. First, I will tell you that it’s worth it! I’ll do a little extra work for a healthy, delicious meal that everyone in the family likes! Second, these two steps take about 20 minutes total and can be done ahead of time. These sandwiches are a great use of leftovers if you happen to have some extra cooked chicken laying around!

Pesto-Chicken-Lemon-Kale-Sandwiches-Words

Pesto Chicken & Lemon Kale Sandwiches

Steps 1 – 3 can be done ahead of time. Store the cooked chicken and kale in the refrigerator until ready to use.
 
Ingredients
  • 8 slices of bread (GF, wheat, or combination of both)
  • 8 tsp pesto
  • 1/2 cup mozzarella cheese
  • 1 boneless, skinless chicken breast
  • 1 bunch kale, roughly chopped into bite sized pieces
  • 1 Tbs olive oil
  • 1 Tbs lemon juice
Directions
  1. Fill a saucepan with water. Bring to a boil and add the chicken breast. Reduce heat to medium and let simmer until the chicken is cooked through, about 12-15 minutes.
  2. While the chicken in cooking, heat the olive oil over medium heat in a large frying pan. Add the kale and saute for about 5 minutes. The kale will turn to a brighter green color and then soften and wilt. Add the lemon juice to the pan and cook, continuing to stir, until there is no more liquid remaining on the bottom of the pan. Remove from heat.
  3. When the chicken has finished cooking shred it using two fork (or cut into bite sized pieces).
  4. Heat a skillet (the same one you cooked the kale in is fine) over medium heat. Prepare the GF bread by spreading a tsp of pesto sauce on one side of each piece of bread. Spray the other side of the bread with cooking spray, and place that side of the bread down on the baking pan. Put about 1/4 of the chicken on one slice of bread, topped with 1 tbs of cheese. On the other slice, spread out some of the lemon kale and top with another tbs of mozzarella.
  5. Cover the skillet with a lid and let cook until the cheese is mostly melted. Remove the two bread slices from the skillet and carefully put them together. Press down on the top of the sandwiches with a spatula to help keep the sandwich together.
  6. Repeat steps 4 and 5 with the reaming bread. Be sure to cook all of the GF sandwiches before cooking any sandwiches using wheat bread.

PGF: Pasta with Sausage & Spinach

Posted on

This 20 minute, 7 ingredient dinner is perfect for a busy day. Pick a sweet or spicy sausage to fit the flavor to your own tastes.

Pasta w Sausage and Spinach

This dinner was birthed out of Christmas chaotic-ness. It was about 7pm and I’d spent all of my cooking energy on cookies. I’d meant to go grocery shopping but ran out of time. I checked for leftovers, but there weren’t any in the refrigerator. My next thought was to make pasta and sauce, but I didn’t even have any pasta sauce in the house! So I scrounged through the near empty refrigerator, found a bag of spinach and some uncooked ground sausage that was nearing the expiration date and got to cooking.

In the time it took to cook pasta I actually ended up with a really delicious dinner. I took a few bites, and was pleasantly surprised, so I snapped a few photos before I devoured the entire plate.

Pasta w Sausage and Spinach 2

This is a PGF (portionally gluten free) recipe. Reflective of how I cook at home, I’ve written this recipe to make half a batch with GF pasta and half a batch of wheat pasta. The recipe calls for 1 pound of pasta total and that pound can be split up in whatever combination of GF/wheat suits your situation.  Like I said, I usually do half and half, but there are lots of options. If you have just one person out of a family of 4 or 5, make just 1/4 of a pound of GF pasta and up the wheat pasta to 3/4 (or vice versa). You can make a full pound of GF pasta, a full pound of wheat pasta, etc, etc.

Pasta w Sausage and Spinach 3

When you’ve finished cooking the pasta it’s time to stir in the sausage and spinach. Don’t worry about measuring out the exact right proportions of spinach and sausage to match the two batches of pasta. Just eyeball it or do a rough measurement; this is not the type of recipe that requires an exact measurement!

Pasta w Sausage and Spinach 4

Pasta with Sausage & Spinach

Although this recipe is written to split half and half between GF and wheat you can easily vary the amount of either type of pasta. See the post above for more info on doing that.
 
Ingredients
  • 1/2 pound GF pasta
  • 1/2 pound wheat pasta
  • 1 pound ground sausage
  • 1 Tbs olive oil
  • 1 onion, minced
  • 3 cloves garlic, cut into thin slices
  • 3 cups chopped spinach
  • 1/4 c shredded asiago cheese (may use parmesan)
Directions
  1. Fill 2 pots with water and bring to a boil. When water is boiling add the GF pasta to one pot and the wheat pasta to the other. Cook each pasta for time listed on the package. If/when you stir the pasta, be sure to use a separate spoon for each pot. Drain pasta when it has finished cooking (I drain the GF pasta in a colander and the wheat pasta using the lid of the pan it was cooked in to avoid contamination) and return to the pot.
  2. While the pasta is cooking, heat the olive oil in a large skillet. Add the onion and garlic and sautee for 3 or 4 minutes, until the onion is soft.
  3. Add the sausage into the skillet and brown, breaking up into small bits.
  4. To the GF pasta, stir in half of the sausage, half of the spinach, and half of the cheese. Add the other half of the sausage, spinach, and cheese to the wheat pasta.
  5. When serving, be sure to use two separate spoons.

Bangers & Mash Casserole

Posted on

This is a healthy casserole. It sounds like it should be unhealthy, it tastes like it should be unhealthy, but it is actually good for you.

Bangers and Mash is a delicious British dish made of sausage and mashed potatoes. Whenever I’ve seen it at restaurants its been very simple; a few sausages on top of a bed of mashed potatoes. There may be some gravy poured over it or a side of veggies, but nothing much different from that.  Bangers and Mash is actually a pretty good meal option for someone on a gluten free diet because most mashed potatoes and sausage are naturally gluten free. I’ve even been surprised at the number of restaurants that make all of their gravies with cornstarch, making that naturally gluten free, too.

IMG_7997

Sausage and mashed potatoes are not exactly the healthiest foods in the world so I made a few swaps to get this casserole up to a more healthy level. For the sausage, I used all natural chicken sausage. Both Al Fresco and Aidells have a full line of flavors in their natural chicken sausages. I’ve tried a few flavor varieties and the best results have been with a cajun flavored sausage. The spicy sausage against the smooth and creamy mash is a great combination. Of course, with all of the sausage flavor options out there I am sure that there are some other great combinations. I just happen to be a fan of spicy foods.

To healthify the mash part of the casserole I swapped the potatoes for cauliflower. Cauliflower is much healthier than potatoes and mashes up to be just as smooth and creamy in texture. There’s a bit of a taste difference between the two, but with all of the other flavors going on in this casserole any flavor from the cauliflower is overpowered.

If the cauliflower wasn’t healthy enough for you, there’s also a quiche layer on the very bottom of the casserole filled with eggs, spinach, and onions. Sure, there’s a little mozzarella cheese in there, too, but what would a casserole be without just a little cheese?!

Surprisingly, with three layers, this casserole won’t take all day to prepare. While the cauliflower is boiling you’ll whip up the quiche layer and brown the sauages. Once those are laid out in the casserole pan you drain and mash the cauliflower, spread it on top, and pop the whole dish in the oven.

Bangers and Mash Casserole

Ingredients
  • 1 head cauliflower
  • 2 Tbs plain greek yogurt
  • 1/2 tsp salt
  • 4 fully cooked, cajun flavored chicken sausage
  • 5 eggs
  • 3/4 tsp baking powder
  • 3/4 tsp salt
  • 3 Tbs all purpose GF flour
  • 2 c chopped spinach
  • 3/4 c shredded mozzarella
  • 1/3 c green onions, sliced
Directions
  1. Preheat oven to 375° F.
  2. Cut the cauliflower into florets and place in the large pot of water. Bring to a boil, and let simmer for about 20 minutes, or until very soft.
  3. While the cauliflower is cooking whisk the eggs together. When the eggs are combined whisk in the baking powder, salt (3/4 tsp), and flour. Stir in the spinach, mozzarella and green onions.
  4. Spray a 2 qt. baking dish with cooking spray and pour the eggs mixture on the bottom.
  5. Cut each of the sausages in half length-wise. If desired, cook the sausages for a few minutes on each side over medium-high heat, until they are lightly browned on each side (Since sausage is already fully cooked, this step isn’t necessary).
  6. Place the sausage in a row on top of the egg mixture. They may sink down into the eggs – this is okay.
  7. When the cauliflower is soft drain it and then return it to the pan. Using an immersion blender or beaters, whip the cauliflower until it is very smooth. Add the greek yogurt and salt and whip again until the yogurt is totally mixed in. Spread the cauliflower on top of the sausages.
  8. Bake for 25 minutes, or until the bottom quiche layer is cooked through.

Chicken in Balsamic Browned Butter Sauce

Posted on

Although the name makes it sound complicated, this chicken dish comes together in under half an hour. Another bonus is that it is a one pan meal, making the clean up quick, too. I tend to choose to make this on busy weeknight days when I want something more elegant than … sandwiches. Or quesadillas made out of whatever leftovers I have in the fridge.

What is more elegant that crispy, buttery, edibile sage leaves? This chicken and sauce are a great pairing, but the sage leaves – they are AMAZING. I almost feel like the rest of the dish would just not be worth eating without the sage leaves. They’re really, really good. And this is coming from a girl who doesn’t like butter. I have yet to find another great recipe to use these buttery sage leaves in so whenever I’m craving them this is what gets made!

I often serve this with homemade spinach pasta. I like how the green pasta and green sage leaves look together. I mix the pasta dough and cut it prior to making the chicken, even the day before. The chicken and sauce is fairly hands on, so throwing some pasta in a pot is an easy way to bulk up the meal without increasing the effort very much. Some steamed veggies or a salad go great with this, too. With those browned butter sage leaves this obviously isn’t the most healthful meal, but it is not horrible in moderation and with the right sides you can end up with a quick, delicious, well balanced meal!

P.S. The sauce is reeeaaallly good mixed on pasta too, not just chicken!

Chicken in Balsamic Browned Butter Sauce

 
Ingredients
  • 3 chicken breasts, cut into bite sized pieces
  • 4 Tbs salted butter
  • 2 Tbs sage leaves (whole)
  • 1 shallot, minced
  • 3 Tbs balsamic vinegar
  • 1/4c hot water
Cooking Directions
  1. Heat a non stick skillet over medium high heat. When the skillet is warm spray it with cooking spray and add half the chicken, spreading it out evenly in one layer. Cook for 2-3 without any stirring, then flip the chicken and cook on the other side another 2-3 minutes, or until cooked through. Remove the cooked chicken from the skillet and set it aside on a plate. Repeat with remaining uncooked chicken.
  2. In the same skillet, reduce the heat to medium low, and add the butter.
  3. When the butter is melted add the sage leaves. Let them cook until crisp (just a few minutes), then remove them from the pan and lay them out in a single layer.
  4. Add the minced shallot next, and cook, stirring, until the shallots are soft. When the shallots are soft add the balsamic vinegar and then the water. If you are making this with pasta, just scoop out some of the pasta water and add it to the pan.
  5. Finally, add the chicken back into the skillet stir until the chicken pieces are coated with the sauce. Serve topped with the crispy sage leaves.