RSS Feed

Tag Archives: Chicken

Sesame Chicken Skillet

Posted on

This recipe is the eighth in my month-long series of healthy, weeknight recipes from all around the web. This is stuff I make time and again, usually with some modifications, and still love! Check back (or follow this blog) to see all of the recipes I’ll be featuring this month!

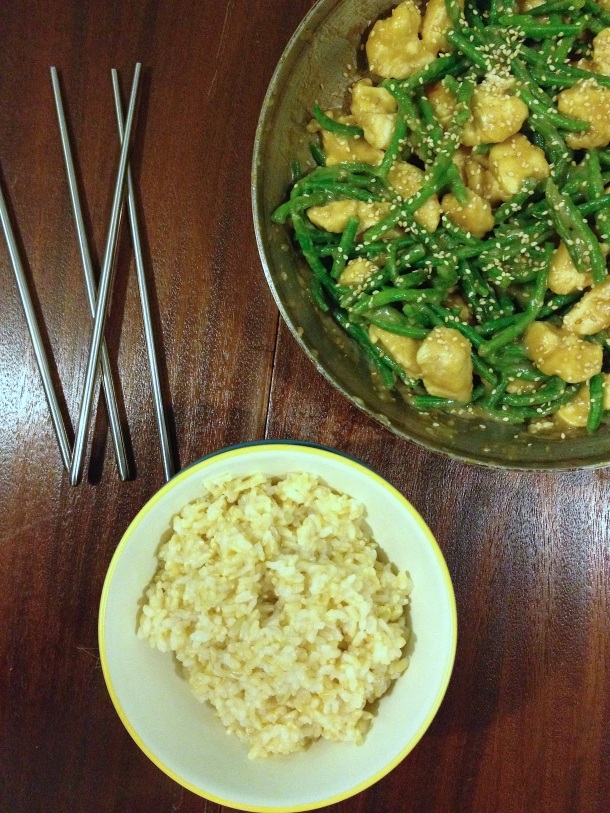
IMG_4237

Let’s just pretend I didn’t take these pictures on the kitchen floor, at 8pm, in horrible lighting, okay?

After making a 20 minute meal for dinner tonight, and then looking at my less-than-ideal photographs of this Sesame Chicken, I’m reminded how important these quick, healthy dinners are in my life. I love cooking, so on the weekends I usually make more complex recipes, but my weeknights are filled with recipes similar to the ones I’ve been featuring this month. I don’t know what I would do without quick meals – takeout isn’t a great option for anyone eating GF, and most days it isn’t practical to spend an hour or so on dinner!

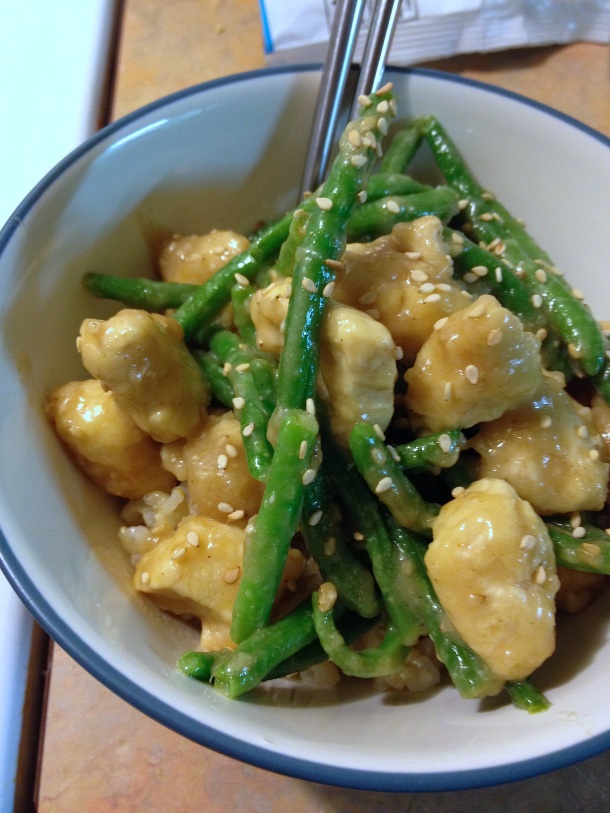
So, I love this Sesame Chicken from How Sweet It Is. It’s quick. It’s hands off. It’s doesn’t take a lot of effort or brain power to put together. Yay! It’s super delicious, too. I don’t think I’ve ever ordered sesame chicken at a restaurant, so I can’t say how this recipe compares in terms of flavor. But I think you’ll like it. I imagine it’s kid friendly, because it’s the kind of thing I would have liked when I was a kid and I was a super picky eater. So, go make this for your family and then enjoy eating it!

IMG_4244

Sesame Chicken Skillet

Recipe Source: How Sweet It Is (Thanks for the great recipe :))

Ingredients

  • 1 lb. boneless, skinless chicken breasts cut into bite sized pieces
  • 3 T gluten free flour (I’ve successfully used rice flour and the Bob’s Red Mill All Purpose GF flour)
  • 2 T sesame oil, divided
  • 1 t garlic powder (or use a couple cloves of fresh garlic)
  • 1 T Bragg’s Amino Acids (or GF soy sauce)
  • 1 t sugar/stevia blend
  • 1 T distilled white vinegar
  • 1/2 c chicken broth
  • 12 oz frozen green beans

Directions

  1. Preheat the oven to 400° F.
  2. Combine the garlic powder, Bragg’s Amino Acids, sugar/stevia, vinegar, chicken broth, and 1 T sesame oil in a small bowl. Set aside.
  3. Heat the remaining tablespoon of sesame oil in an oven proof skillet over medium high heat. While the oil and skillet are preheating add the chicken and GF flour together in a bowl and toss until the chicken pieces are coated in flour.
  4. When the skillet is warm add the flour coated chicken in one, single layer. Stir after 3 minutes, spread into a single layer again and let cook for another 3 minutes.
  5. Add the already mixed sauce to the skillet, stir gently, and then place the entire skillet in the oven to bake for 15 – 20 minutes, or until chicken is cooked through and reaches a temperature of 165° F.
  6. When the chicken is almost finished, defrost the green beans in the microwave according to package directions (I always get the steam in the bag kind – love it!)
  7. When the chicken is cooked through remove from the oven and stir in the green beans. Sprinkle with the sesame seeds.

Serve this with

  • White or brown rice, or quinoa
  • 2 T sesame seeds

Lemon Garlic Chicken and Zucchini Noodles

Posted on

This recipe is the sixth in my month-long series of healthy, weeknight recipes from all around the web. This is stuff I make time and again, usually with some modifications, and still love! Check back (or follow this blog) to see all of the recipes I’ll be featuring this month!

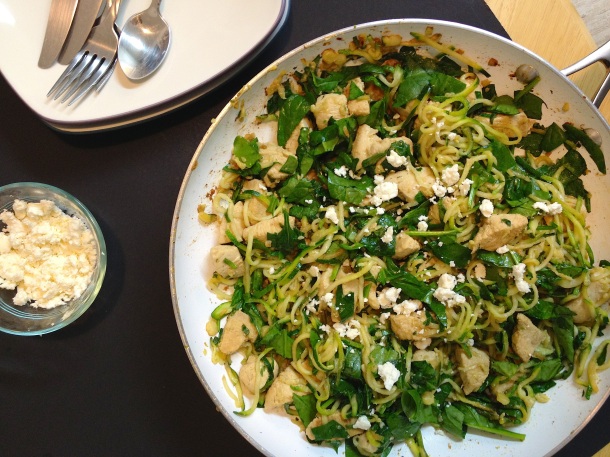
Zucchini-Noodles-with-Lemon-Garlic-Chicken-Spinach-GF-healthy-dinner

This recipe is a concatenation of a few recipes from other food blogs. The ingredient inspiration comes from this Inspiralized dish and the flavors come from this chicken and rice recipe on MidEats. I love the combination of the two. The flavors are light and fresh – a perfect pairing for the veggies. I know it isn’t exactly (or even close to) zucchini season, but even in the winter I still enjoy cooking and eating this dinner.

If you are new to spiralizing and/or making zucchini noodles see my post here about making zucchini noodles. I go through a couple extra steps to get zucchini noodles with a great texture. It takes a little longer because you have to let the “noodles” sit and drain for a little while, but I promise the results are worth it. Plus, this is still a quick meal, even with the extra steps. You’re looking at about 30-40 minutes, with only about half of that time actually being active cooking.

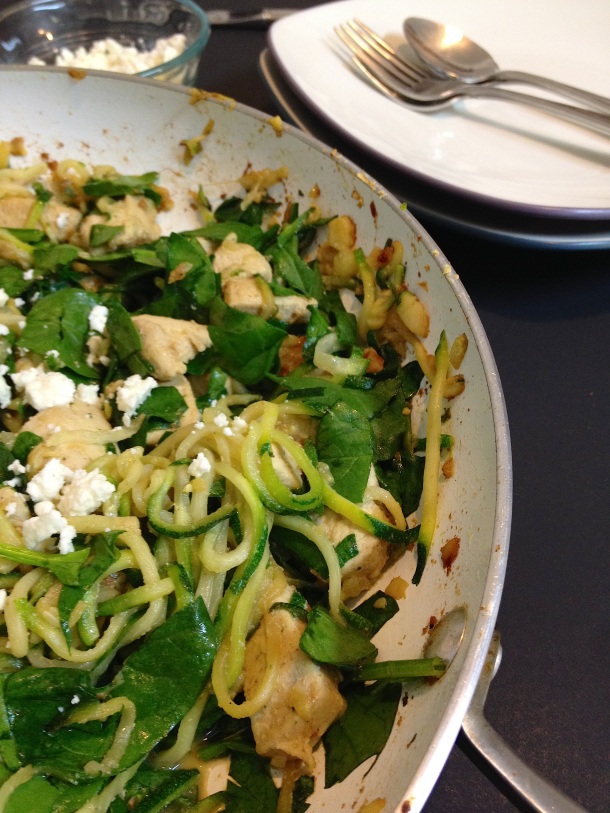
In terms of healthfulness, it’s hard to beat this dinner! Lean chicken, protein packed spinach, and a few zucchinis. I top mine with a few feta cheese crumbles, but that hardly ruins a healthy meal. I can’t give any guarantees or promises that this is a kid friendly meal, but I can say that both adults in this household love eating this!

Zucchini-Noodles-with-Lemon-Garlic-Chicken-Spinach-Healthy-Gluten-Free-Weeknight-Dinner

Lemon Garlic Chicken and Zucchini Noodles

Ingredients

  • 3 zucchinis
  • 1 lb. boneless skinless chicken breast
  • 2 T + 2 t olive oil, divided
  • 3 T lemon juice (or juice from 1 lemon)
  • 3 garlic cloves, minced
  • 1 t dried oregano
  • 1 t cumin
  • 4 large hand fulls spinach
  • feta cheese for topping, optional

Directions

  1. Spiralize each of the zucchinis. Place the zucchini noodles in a stainer in the sink. Sprinkle with salt. Let sit for about 30 minutes.
  2. While the zucchini is soaking, cut the chicken into bite sized pieces. Add 2 T olive oil, lemon juice, garlic, oregano, and cumin. Stir to coat chicken. Put in the refrigerator to marinate for 15 minutes (up to overnight).
  3. After at least 15 minutes, heat a large skillet over medium high heat. Add the chicken + marinade to the skillet. Cook, stirring every few minutes, until the chicken is done and all the juices are absorbed, about 10 minutes. While the chicken is cooking use a thin towel or cheesecloth to wring out the excess liquid from the zucchini noodles (more detail on this step can be found in this post).
  4. Remove the chicken from the skillet to a plate. Add the remaining 2 t of olive oil to the skillet.Give the oil a minute or two to warm, then add the zucchini noodles to the skillet. Stir constantly for about 2 minutes, to let the noodles heat up.
  5. Add the chicken and the spinach to the skillet. Keep on the heat just long enough for the spinach to wilt.
  6. Top with feta cheese crumbles before serving, if desired.

Serve this with

  • NOTE: This skillet can be a stand alone meal. As is, the recipe is grain free and paleo. Personally, I feel lousy without whole grains in my diet, so I usually include a quinoa side dish with this meal. Feel free to serve the skillet on it’s own if that works for you!
  • Quinoa Pilaf
  • Lemon Risotto
  • Coming soon . . . quinoa patties.

Dilled Chicken and Asparagus

Posted on

This recipe is the second in my month-long series of healthy, weeknight recipes from all around the web. This is stuff I make time and again, usually with some modifications, and still love! Check back (or follow this blog) to see all of the recipes I’ll be featuring this month!

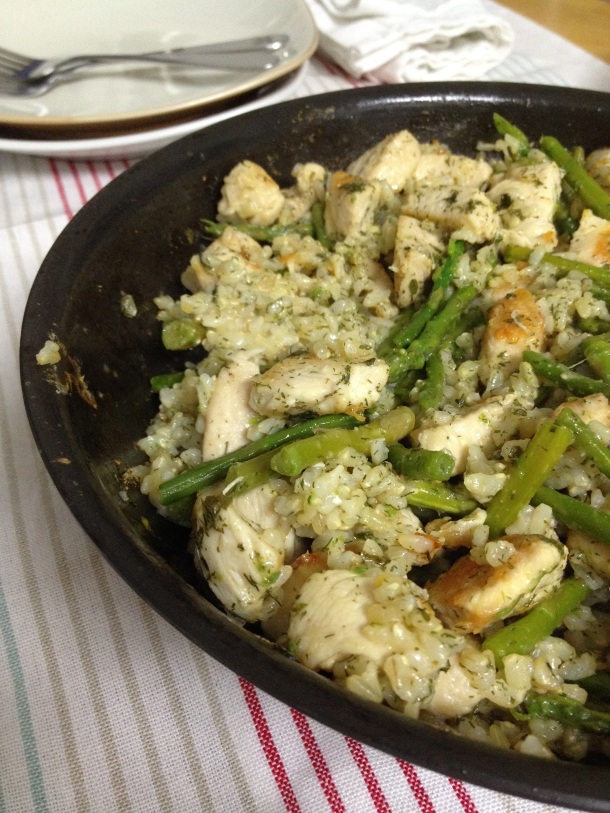
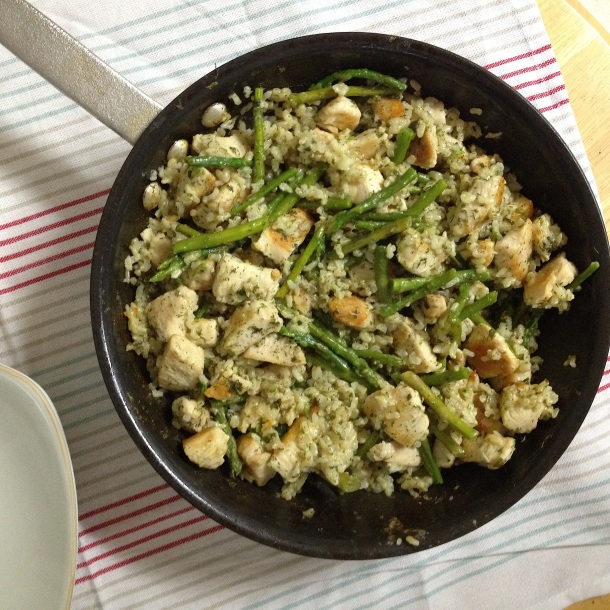
I found this recipe on Taste of Home about a year ago, and I’m so happy that I did! Originally a recipe to feed two people I thought it would be a great dinner for Steve and I. Of course, we ate the entire skillet-full because it was so good.

Dilled-Chicken-And-Asparagus-Gluten-Free-Healthy-30-Minute-Dinner

Yes, this is an (almost) one pan meal. You cook the rice on it’s own, and add it to the skillet with the chicken and asparagus once it’s cooked. So, you will dirty two pans, yes. But, you don’t need to be attending to both at once since the rice just simmers covered. Of course, this would be even easier with a rice cooker!

My first modification to this recipe was to increase the amount of asparagus. In my mind a few spears apiece just wasn’t enough vegetable content for a full meal. I switch up whether I use brown rice or white rice, but I always use Better Than Bouillon instead of a bouillon cube. Those have so much salt!

I love that there is nothing fake or artificial in the sauce, but it still provides so much flavor. Chicken + Asparagus + Rice sounds a bit cliche and boring, and like it has the potential for that healthy-food-cardboard taste. The sauce and bouillon do away with any potential bland-ness.

Dilled-Chicken-And-Asparagus-Gluten-Free-Healthy-30-Minute-Dinner-2

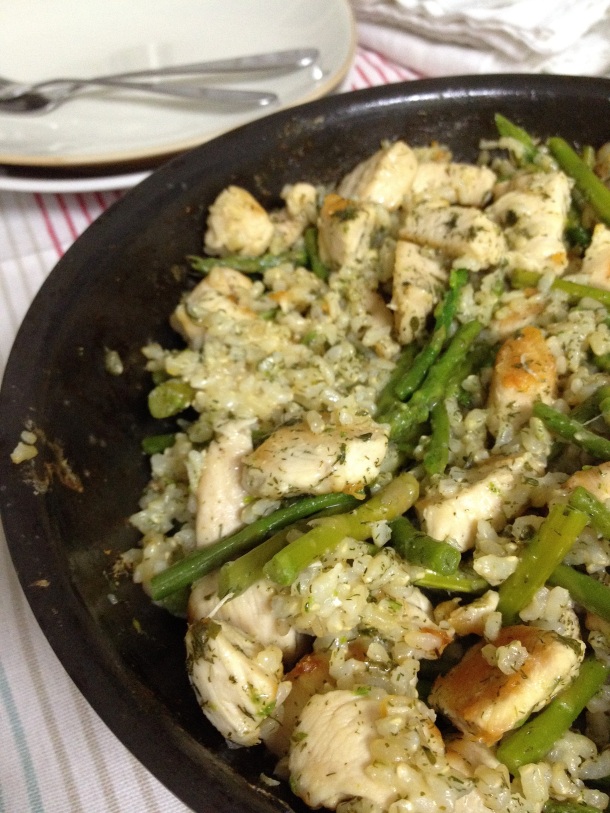
Best of all though, this dinner will be ready, start to finish, in 30 minutes. That’s why it is one of my top favorites for healthy weeknight dinners. Enjoy!

Dilled-Chicken-And-Asparagus-Healthy-Gluten-Free-30-Minute-Meal-3

Dilled Chicken and Asparagus

Recipe source: Taste of House. This version serves 4.

Ingredients

  • 1 c rice (use white rice to have this ready within 30 minutes. If you use brown, plan for extra cooking time).
  • 2 c water
  • 2 t Better Than Bouillon Chicken Base (or other type of bouillon)
  • 4 t freshly minced parsley (dried works, too)
  • 2 T lemon juice
  • 1 T olive oil
  • 1 T dill weed
  • 2 t garlic powder
  • 1 bunch asparagus, cut into 2-3 inch pieces (amounts vary by the bunch, mine are between 8 and 12 oz).
  • 1 lb. boneless, skinless chicken breasts, cut into bite sized pieces

Cooking Direction

  1. Add the rice, water, and bouillon to a saucepan. Bring to a boil. Reduce heat, cover, and let simmer for about 15 minutes, or until the rice is done (longer for brown rice).
  2. In a small mixing bowl combine the parsley, lemon juice, olive oil, dill weed, and garlic powder.
  3. Fill a large-ish skillet with about an inch of water and bring to a boil. Once boiling, add the asparagus. Cover, and let cook for 2-3 minutes. Immediately drain the asparagus and set aside.
  4. In the same skillet, add the chicken and cook at a medium high heat until the chicken is cooked through, about 3 -5 minute per side (I usually cut a piece in half to see if it’s done. Pink inside? cook more. White and opaque? ready to eat!). Let the chicken sit in the pan for another couple of minutes, burner still on, to get the golden brown crisp on the outside.
  5. Add the asparagus, rice, and sauce mixture to the skillet and stir until sauce is evenly distributed.

Buffalo Chicken Spaghetti Squash

A creamy, health-ified buffalo chicken mixture served on top of roasted spaghetti squash. A great, nutritious way to enjoy buffalo chicken for dinner!

Buffalo-Chicken-Spaghetti-Squash-Front

For the past ten minutes I’ve been killing time on the internet, trying to figure out how to adequately express that this is just the best meal ever. I mean, I’m a food blogger, ideally everything I post should be perfect and delicious. Will anyone really believe me if I say this is the best food you’ll ever eat?

Buffalo-Chicken-Spaghetti-Squash-Square

And then I thought I could convince you by telling you how often we eat Buffalo Chicken Spaghetti Squash (like, once a week) and how much time I spent trying to take photographs that would show just how mouthwatering it is (3 photoshoots).

I remembered that part of what is so great about this dinner (heck, I’d eat it for breakfast) is that it is healthy, guilt free, and made with good-for-you ingredients. Maybe that is the biggest selling point?!

Buffalo-Chicken-Spaghetti-Squash-Close

As with any food though, flavor matters! Made with the best hot sauce ever, Frank’s Red Hot (or use whatever your favorite is, no hard feelings!) this is as spicy as any buffalo chicken flavored item out there, with a kick of ranch flavor. The creamy buffalo sauce will cover the chicken and spaghetti squash so each mouthful is full of buffalo taste. If you’ve been reading this blog much you know I’m not a huge fan of leftovers and repeat meals, but I ALWAYS want these leftovers the next day!

I hope by now you’re convinced that this may in fact be the best meal ever. Please, try it for yourself, and let me know!

Buffalo-Chicken-Spaghetti-Squash-Tall

Buffalo Chicken Spaghetti Squash

Ingredients
  • 2 boneless, skinless chicken breasts, or 5 chicken tenderloins (this amount does not need to be exact. Also, feel free to skip step 3 and add any cooked cubed or shredded chicken you have on hand)
  • 1 c plain greek yogurt
  • 1/2 c Frank’s Red Hot Sauce (if using a wing sauce, increase to 2/3 c), or more/less to taste
  • 2 T dry ranch seasoning (use a homemade version or make sure the variety you choose is GF)
  • 1 c shredded cheddar cheese (and, honestly, this is delicious without cheese)
  • 2 small spaghetti squashes
  • sliced green onions, for garnish
Directions
  1. Preheat the oven to 400° F.
  2. While the oven is preheating cut the spaghetti squashes in half. I use a long serrated knife, start in the middle, and take my time working my way around the squash. Scoop the seeds out of the squash and discard. Place the squash halves cut side down on a baking sheet (I always put mine of a silpat mat) and bake for 30 – 50 minutes. Different size squashes need different cooking times. I always start checking mine for done-ness at the 30 min mark.
  3. While the squash is cooking, trim any fat off of the chicken. Place it in a saucepan with water and bring to a boil. Reduce heat to medium high and keep a low boil until the chicken is cooked through, about 10 – 15 minutes depending on the thickness of your chicken pieces. Remove the cooked chicken from the pan and let cool on a plate. Once it has cooled a bit, use two forks to shred it.
  4. Add the greek yogurt and hot sauce to a small sauce pan. Heat over medium heat. When the greek yogurt has “melted” add the ranch seasoning and stir to combine. Stir in the shredded chicken  and remove from the heat.
  5. When the spaghetti squash is cooked use a fork to scrap the “spaghetti” strands off the walls of the squash. Top each squash half (filled with the spaghetti squash strands) with 1/4 of the buffalo chicken mixture and sprinkle each with 1/4 c cheese.
  6. Place the spaghetti squash back in the oven and cook for another 5 – 10 minutes, or until the cheese melts.
  7. Garnish with sliced green onions and enjoy!
Serve this with
  • I serve this as a complete meal. If you’re looking to add something to the meal, a salad, corn on the cob, or a roasted vegetable would be great choices!

Crispy Parmesan Chicken

Posted on

There’s no breading in this crispy baked chicken! Perfectly moist on the inside, crunchy on outside, all without any gluten or grains!

Crispy-Parmesan-Chicken-Gluten-Free-Tall

Sometimes experimental cooking goes well, other times it goes poorly. This chicken is an example of experimental cooking success. In fact, it turned out far better than expected! I never intended this chicken to be a food blog recipe, or even especially good. If this chicken had turned out mediocre I would have, sadly, been totally okay with that. I just wanted a quick and easy protein to go with dinner.

Well, this is quick and easy AND delicious. The chicken takes all of 5 minutes (if that) to prep. It comes out of the oven with a crisp, golden crust. The chicken is moist and juicy on the inside, with a strong parmesan flavor.

Crispy-Parmesan-Chicken-Gluten-Free-Close

My super, not-so-secret ingredient in this recipe is almond meal. Sure, you can use bread crumbs to make a crispy coating for chicken, but it’s not always that simple when you are on a gluten free diet. Store bought gluten free bread crumbs are expensive, and making homemade GF bread crumbs isn’t exactly quick and easy.

Crispy-Parmesan-Chicken-Gluten-Free-All

You might be thinking “but almond meal is also expensive”! It’s true! That’s why I make my own. I get raw almonds in bulk, and grind them up for a few seconds in my blender. This almond meal doesn’t have the same perfectly consistent texture as the store bought kind, but it’s good enough for almost every need I have. It also ends up being cheaper per pound than gluten free bread crumbs (at least the varieties I can find locally). By using almond meal instead of bread crumbs you’re also making the dish healthier – adding protein and cutting some carbs! It’s a great grain free alternative to breaded chicken.

Crispy-Parmesan-Chicken-Gluten-Free-Above

The other part of the crispy coating is parmesan cheese. Another money saving idea here – check the price of parmesan wedges at your local grocery store. I’ve found the normal price for a 1 lb wedge of parmesan is less, per pound, than a jar of the brand name, pre-grated cheese. With a grater, it will only take a couple minutes to shred the entire wedge. Freshly grated parmesan beats the pre-grated parmesan in flavor hands down! That’s part of what makes this chicken taste so good – a little bit of fresh parmesan goes a long way!

Crispy-Parmesan-Chicken-Gluten-Free-Square

 Crispy Parmesan Chicken

Ingredients
  • 2 boneless, skinless chicken breasts or 5-6 chicken tenders
  • 1/4 c almond meal
  • 1/4 c grated parmesan cheese
  • cooking spray
Directions
  1. Preheat the oven (or toaster oven) to 375° F.
  2. Combine the almond meal and parmesan cheese in a shallow bowl.
  3. Trim the chicken of any excess fat.
  4. Spray each piece of chicken with cooking spray, then lay it in the bowl with the almond meal and parmesan mixture. Press each side of the chicken down, to get the coating to stick. Place the coated chicken on a baking sheet lined with aluminum foil. Repeat with the remaining pieces of chicken.
  5. Press any extra parmesan coating that is in the bowl onto the tops of the chicken pieces.
  6. Bake for 20 – 30 minutes. Thin chicken tenders will need less time to cook through than a thick chicken breast. When the chicken is done the outside will be golden and crispy, and the internal temperature should reach 165° F.
Serve this with:


PGF: Chipotle & Avocado Chicken Burgers

Posted on

This is not your normal hamburger. These chicken patties are lightly seasoned with zesty spices and stuffed with cool avocado. You will enjoy them with or without a hamburger bun!

Chipotle-Avocado-Chicken-Burgers-on-grill

I think I have a “thing” with hamburgers. I’ve eaten a lot of burgers in my day – hamburgers, cheeseburgers, turkey burgers. Almost every week I announce that dinner tonight is “burgers”. But I never, ever make an ordinary burger. I just can’t do it. There are so many good flavors out there that make an ordinary burger into something amazing!

Last summer I shared my Sweet Thai Chili Burgers, which are pretty unique in terms of flavored hamburgers. These Chipotle & Avocado Chicken Burgers are much milder. If you’re not crazy about over the top flavors or want a gentle introduction into the world of flavored burgers these would be a great choice.

Chipotle-Avocado-Chicken-Burgers-Front

If you glance down at the ingredient list you may notice a few strange things. If you don’t have any chipotle chili powder you may want to consider getting some. It’s similar to regular chili powder, but a bit stronger and has a smoky taste. I get mine in the Hispanic section of the grocery store for less than $2 a jar! Of course, you could sub in any other chili powder you have on hand, resulting in only a slightly different flavor. The last ingredient on the list is shredded zucchini. I know, I know, it sounds crazy weird, but the zucchini will help give the burgers body. To prepare the zucchini you’ll want to shred it – I use a box grater. Take the shredded zucchini and put it in a cheesecloth or thin towel and wring out the liquid. You’ll want to measure the 1/3 cup once you’ve done all the preparations with the zucchini. If you’re adverse to zucchini or don’t want the extra work you can sub in breadcrumbs. I promise though, nothing about this burger taste like zucchini! Avocado is definitely a strange ingredient in burgers, but it actually handles the grilling quite well.

I generally eat these burgers plain, but there’s nothing like a good GF hamburger bun now and again. It’s easy to turn this into a portionally gluten free meal, just serve with regular and gluten free hamburger buns! Avoiding cross contamination is easy – just serve the GF hamburgers first, before you even get out the wheat hamburger buns. Make some corn on the cob, lay out some burger toppings, and you’ll have a simple, gluten free, summer meal!

Chipotle-Avocado-Chicken-Burgers-Tall

Chipotle & Avocado Chicken Burgers

This recipe makes 4 chicken burgers, but is easily modified to make a double batch, or even slider sized burgers.
 
Ingredients
  • 1 lb. ground chicken breast
  • 1 small avocado, cut into small cubes
  • 1/2 onion, minced
  • 1 tsp dry mustard powder
  • 1 tsp chipotle chili powder
  • 1 tsp garlic powder
  • 1/2 tsp salt
  • 1/2 tsp paprika
  • 1/4 tsp cumin
  • 1/3 c shredded zucchini, with liquid squeezed out.
Directions
  1. In a mixining bowl, combine all ingredients except the avocado.
  2. Once the spices are thoroughly mixed into the chicken gently stir in the avocado.
  3. Form the mixture into 4  patties using your hands.
  4. Grill over medium high heat for about 5-7 minutes on each side. Make sure the burgers reach a temperature of 165° F.
  5. Serve plain, or with hamburger buns.

PGF: Grilled Fajitas

Posted on

Guys, it is officially grilling season! One of my first grilled meals of the year were these fajitas.

Grilled-Fajitas

I know lots of people around the US are just getting used to the sun light again after an endless winter, but not the case in the south. Actually, if you ask a native of this area they will tell you the horrors of the temperature getting into the 30s! And snow, yes snow, and THREE WHOLE TIMES! I guess after spending most of my life in the northeast winter doesn’t phase me.

Here’s what does get to me though: when the temperature is in the 100s. You mean I’ll be too hot in pants? And sweating no matter what I wear? It’s May and I have to have the air conditioning on? We have air conditioning?!?! People who have lived in the south for a while though, this is nothing to them. They are really happy it’s finally warming up!

To each his own, I suppose.

And, truthfully, I do hope to adapt to the higher temperatures. It’s no fun to feel nauseous every time I step outside.

So, summer and high temperatures means that the grill is my primary cooking tool. No sense in heating up the house with the oven when the air conditioner is on full blast. I’m sure these grilled fajitas are just the first in a long line of grill recipes coming your way this summer.

Grilled-FajitasThese 6 ingredients fajitas are really yummy and very simple thanks to a very special ingredient, Wegman’s Fajita Marinade. For those of you who don’t know, Wegmans is not a product, but it is the best grocery store on earth! You think I’m exaggerating, but I am not. This place has been supporting GF products and labeling for at least 10 years – that’s far before most other chain stores jumped on the bandwagon. Their store brand products are usually better quality, and cheaper, than the name brand! If you want something in your pantry, Wegmans has it. When you get to the check out there are at least 20 lines, so it’s unlikely you’ll have to wait long. Unlike my local Harris Teeter, those lines are actually open. Imagine that. Anyway, if you are lucky enough to live somewhere with a Wegmans (sadly, I do not) then you know exactly what I’m talking about (and probably have your own raving reviews to share).  The rest of you are probably quite confused about my strong allegiance to a grocery store.

All that to say that Wegman’s has a line of marinades including a fajita marinade. It turns making a really flavorful meal very simple. I cut  the chicken into small cubes (actually Steve did it, because of my finger injury), dumped some marinade on it and refrigerated overnight. Viola! The next day we skewered the chicken with some onions and green peppers, put it on the grill for a few minutes, and had a delicious, healthy dinner without turning on a single kitchen appliance! Pretty cool when it’s 90° F. Pun intended.

Grilled Fajitas

We ate a few fajitas each at dinner time. Steve had never had the magic Wegman’s Fajita Marinade before, and he was loving the flavor. I think he was eating fajitas and plain meat/onions/peppers.

This is how a professional geek eats a fajita.

This is how a professional geek eats a fajita.

We snacked on the fajitas for the rest of the evening, and it turns out they were pretty good cold, too! If you’re wanting to make Grilled Fajitas but don’t have a Wegmans nearby here’s my suggestion: just use any brand fajita marinade. Really, anything with a Mexican-ish flavor scheme will work with fajitas. It may not be quite as delicious, but almost anything marinaded overnight has a wonderfully strong flavor the next day!

Now, this post is getting really long so I’m just going to get on with the recipe. I hope I didn’t talk your ear off!

Grilled Fajitas

Grilled Fajitas

Ingredients
  • 1 lb boneless, skinless chicken breasts
  • 1 green pepper
  • 1 onion
  • 1/2 c Wegmans Fajita Marinade
  • corn tortillas (you can easily make this recipe PGF by letting anyone with a gluten intolerance use flour tortillas)
  • shredded mexican blend cheese (or use any cheese variety you like)
  • Any other topping you would enjoy – tomato, avocado, etc.

Directions

  1. Cut the chicken into 1 to 2 inch cubes. Put the cubed chicken in a bowl and stir in the marinade. Cover and refrigerate overnight.
  2. The next day, cut the onion and green pepper into pieces about the same size as you made the chicken cubes.
  3. Get the chicken out of the refrigerator and make your skewers, alternating chicken, vegetable, chicken, vegetable, etc. Discard any extra marinade.
  4. Grill the skewers for 4 to 5 minutes on each size, over medium-high direct heat. Before removing from the grill make sure that the chicken has reached a temperature of 165° F.
  5. Slide the meat off of the skewers and spread a few pieces of each meat/vegetable onto the center of a corn tortilla. Top with cheese. Repeat with any flour tortillas. Be sure to keep the corn and flour tortillas separate!

Chicken Chilaquiles Casserole

Posted on

A fun, naturally GF dinner with a Mexican flare. Easily made to suit your tastes with any salsa flavor you like!

Chicken-Chilaquiles-Casserole-tall

My introduction to chilaquiles was when we were in Mexico on our honeymoon. We were at one of those all inclusive resorts so there was food everywhere. Everywhere! You could go up to a bar while in the pool and order food or drink.

Yeah, there was also alcohol everywhere. And we are not really into drinking much. Actually, we don’t drink at all. Neither of us really likes the taste of alcohol in the first place, and being celiac my options are limited. I may have a glass of wine here or there. Sounds so weird, but it’s true. Two adults who legitimately dislike alcoholic beverages.

We tried a variety of drinks in Mexico, wanting to have fun and make the most of all you can eat and drink atmosphere, but we just didn’t like anything. So, we had to make up for our lack of drinking alcohol with eating food. Some nights we had two dinners. I was getting fancy coffees a few times a day. It was great.

There was a huge room service menu, and one of the breakfast options was “chilaquiles”. I had no idea what it was. We ordered it, along with a bunch of other things (after all, it was all already paid for), and the next morning this plate that looked kind of like nachos arrived with our breakfast. The chilaquiles were good! Lots of flavors, some crunch, and a bit of spice. Honestly, I’m not sure why it is a breakfast dish, but I was a fan.

So, when a Chicken Chilaquiles Recipe and a Homemade Tortilla Chip recipe appeared within days of each other, I just had to try it all out! Savoring the last “cool” (if 80s counts as cool) days before summer hits, I turned this into a casserole to get in some final uses of my oven before it’s too hot to even think of turning on. Gotta love casseroles!

Chicken-Chilaquiles-Casserole-Sq

Rather than using store bought, fried tortillas chips I made my own using this guide from the Kitchn. It was so simple. I got out a few tortillas, sprayed them with olive oil (using a misto), sprinkled with salt, cut into wedges, and baked at 350° F for 15 minutes. My chips took a little longer than the guide said. Just check yours frequently so you can take them out when the reach that perfect level of crispness, and not when they are burnt! The tortillas chips turned out great and it took a lot of willpower to not eat them all before they went into the casserole.

Chicken-Chilaquiles-Casserole-Chips

I always tend to have some leftover shredded chicken around, so this was a great way to use that up. Any other meat or bean would be good in this casserole. If you’d put it on a taco or burrito, then you can throw it in this casserole! I’d honestly meant to throw in some additional diced tomatoes and then totally forgot! It was good anyway. Just have fun with this – make it to suit your tastes!

Chicken-Chilaquiles-Casserole-Close

Chicken Chilaquiles Casserole

Recipe Inspiration from The Mother Huddle and the Kitchn.
Serves 3 -4 (and the leftovers are good, too!)
 
Ingredients
  • 8 corn tortillas, made into chips (or total of 64 GF corn tortillas chips)
  • 10 oz shredded chicken (from about 2 small or 1 large chicken breast, approximate amount is fine)
  • 12 oz black beans
  • 1 c salsa
  • 1/2 c chicken broth
  • 3 Tbs plain greek yogurt
  • 3/4 c shredded cheese (I used colby jack, choose any variety you like).
Directions
  1. Preheat oven to 350°F.
  2. In a saucepan, stir together the salsa and chicken broth.
  3. Add the chicken and black beans and bring to simmer. Add the greek yogurt and stir to combine.
  4. Prepare a baking dish (I used a 10 x 6 glass baking dish) by spraying it with cooking spray (I use misto). Put a layer of chips on the bottom of the pan, then spread half of the chicken mixture on top of it.
  5. Repeat the layers, leaving a handful of chips remaining.
  6. Top with cheese. Bake for about 20 minutes, or until cheese is melted.
  7. Serve with remaining chips, or place them on the top of the baked casserole for an extra crunch.

PGF: Pesto Chicken & Lemon Kale Sandwiches

Posted on

n-Lemon-Kale-Sandwiches-1

Pesto Chicken & Lemon Kale sandwiches make a quick and healthy meal. These warm, toasted sandwiches can be made with GF or wheat bread. Perfect for a group of people who have differing dietary needs. The lemon and pesto combination is irresistable. Whether you are eating GF or not you will love this sandwich!

I really enjoy eating soup. There’s nothing else like a tomato soup and grilled cheese, and any time I feel sick with anything I make Avgolemono Soup. I have a whole pinterest board just for soups I want to try!

Soup is a cold weather food. The last thing you want to do on a hot day is eat a big bowl of steaming soup. Hot days are the majority here, so as summer approaches I’ve been trying to get my fill of soups.

A few weeks ago, when the temperature starting getting into the 70s, I kind of freaked out about all the soup recipes I wanted to try and hadn’t had the chance yet! There was one soup in particular that I was anxious to try so I planned to make it that very night. I needed something a little more substantial to go with the soup so I invented these sandwiches out of ingredients from my refrigerator.

Pesto-Chicken-Lemon-Kale-Sandwiches-2

The soup, sadly, wasn’t that great but the sandwiches were awesome! The lemon flavored kale and pesto go together strikingly well. As someone who usually eats all of my foods separated I was honestly a little worried, but the sandwich was 100% enjoyable. The tastes and textures all blended together perfectly. Even the GF bread was perfect. It browned and crisped up so much better than the sandwiches I made on wheat bread for Steve.

Pesto-Chicken-Lemon-Kale-Sandwiches-3

Before actually putting together these sandwiches you’ll need to cook some chicken and saute some kale. It sounds like a lot of work for a sandwich, I know. First, I will tell you that it’s worth it! I’ll do a little extra work for a healthy, delicious meal that everyone in the family likes! Second, these two steps take about 20 minutes total and can be done ahead of time. These sandwiches are a great use of leftovers if you happen to have some extra cooked chicken laying around!

Pesto-Chicken-Lemon-Kale-Sandwiches-Words

Pesto Chicken & Lemon Kale Sandwiches

Steps 1 – 3 can be done ahead of time. Store the cooked chicken and kale in the refrigerator until ready to use.
 
Ingredients
  • 8 slices of bread (GF, wheat, or combination of both)
  • 8 tsp pesto
  • 1/2 cup mozzarella cheese
  • 1 boneless, skinless chicken breast
  • 1 bunch kale, roughly chopped into bite sized pieces
  • 1 Tbs olive oil
  • 1 Tbs lemon juice
Directions
  1. Fill a saucepan with water. Bring to a boil and add the chicken breast. Reduce heat to medium and let simmer until the chicken is cooked through, about 12-15 minutes.
  2. While the chicken in cooking, heat the olive oil over medium heat in a large frying pan. Add the kale and saute for about 5 minutes. The kale will turn to a brighter green color and then soften and wilt. Add the lemon juice to the pan and cook, continuing to stir, until there is no more liquid remaining on the bottom of the pan. Remove from heat.
  3. When the chicken has finished cooking shred it using two fork (or cut into bite sized pieces).
  4. Heat a skillet (the same one you cooked the kale in is fine) over medium heat. Prepare the GF bread by spreading a tsp of pesto sauce on one side of each piece of bread. Spray the other side of the bread with cooking spray, and place that side of the bread down on the baking pan. Put about 1/4 of the chicken on one slice of bread, topped with 1 tbs of cheese. On the other slice, spread out some of the lemon kale and top with another tbs of mozzarella.
  5. Cover the skillet with a lid and let cook until the cheese is mostly melted. Remove the two bread slices from the skillet and carefully put them together. Press down on the top of the sandwiches with a spatula to help keep the sandwich together.
  6. Repeat steps 4 and 5 with the reaming bread. Be sure to cook all of the GF sandwiches before cooking any sandwiches using wheat bread.

Spicy Tomato Chicken Noodle Soup

Posted on

Over the past couple of weeks us folks in the south have been hit with a couple of very rare snowstorms. As a former northerner I’m not phased, and it’s actually exciting to see the snow again. Snow is uncommon here so there are no snow plows or salt trucks. Schools are closed and everyone gets sent home from work. It gets so hot and humid here in the summer, so I’m trying to live up this cold weather while I have the opportunity. I’m doing lots of awesome, and less awesome stuff, like drinking hot chocolate, eating lots of soup, and wearing fleece. Hence the chicken noodle soup. In a month or two it will be so hot I won’t be able to bear the idea of heating the house anymore and do all of my cooking on the grill. I’ve gotta eat soup now while I can!

Spicy Tomato Chicken Noodle Soup

When my sister, Lauren, found this recipe a long time ago it was just a regular chicken soup with some tomato soup added at the end. Lauren and I have a history of making everything spicy, and that’s exactly what we did with this recipe. We had a few go-to spice blends that we added to everything. One of us would stir and the other would shake in various amounts of these spices. Then we would taste, evaluate the flavor, and adjust accordingly. I love cooking this way, but it’s not exactly conducive to writing out a recipe. I finally took some time to measure out the spices that I use.

Spicy Tomato Chicken Noodle Soup 2

This recipe was an easy favorite to modify for a gluten free diet once I was diagnosed with celiac. Rather than using regular pasta, I subbed in GF pasta or even rice. To make this a portionally gluten free recipe separate the finished soup into two saucepans. Add GF noodles to one pan and wheat noodles into the other. Just be sure to boil the pasta in two separate pots and use two sets of utensils for preparing both pasta varieties!

This is not your ordinary chicken noodle soup. It has a good amount of tomato flavor and good kick of spice. This will warm you up inside and out. The chicken is cooked in broth and seasoning to amp up the flavor. Don’t let the large ingredients list and long set of directions scare you off. Over the course of the hour and a half it takes to prepare this soup you’ll only be actively involved for about 20 – 30 minutes.

Spicy Tomato Chicken Noodle Soup 3

P.S. If you’re curious about that foccacia bread in the photos check back on Monday for the recipe!

Spicy Tomato Chicken Noodle Soup

See post above for directions on how to make this meal portionally gluten free. If you’re not a fan of spicy soups leave out the crushed red pepper flakes and the cayenne pepper.
 
Ingredients
  • 6c water
  • 2 chicken breasts
  • 3/4 tsp garlic powder
  • 1 tbs parsley flakes
  • 3/4 tsp onion powder
  • 3 tsp chicken bouillon ( I use Better than Bouillon)
  • 3 Tbs olive oil
  • 1 onion, minced
  • 3 cloves garlic, minced
  • 3/4 c plain tomato sauce
  • 2 Tbs chili powder
  • 1/2 tsp red pepper flakes
  • 1 Tbs mexican seasoning (I have a McCormick Mexican seasoning, but any mexicany flavored seasoning will do)
  • 2 shakes cayenne pepper
  • 1 1/2 c cooked GF pasta or rice (see post above for PGF directions)
Directions
  1. Put the water in a large saucepan and add the garlic and onion powder, parsley flakes and bouillon. Bring to a boil and stir to dissolve the spices. cut each of the chicken breasts in half, add the the pot, and let simmer for 1 hour.
  2. Towards the end of the 1 hour of simmering, heat the olive oil in a medium skillet over medium heat. Once warm, add the onions and garlic and cook until softened, stirring frequently to keep the garlic from burning.
  3. Once the chicken has simmered for an hour remove it from the pan and shred or chop into bite sized pieces.
  4. Add the chicken into the pan, as well as the cooked onion/garlic. Add the tomato sauce, chili powder, red pepper flakes, Mexican seasoning, and cayenne pepper. Stir well.
  5. Add the cooked pasta or rice into the pot and let simmer for couple of minutes before serving.