RSS Feed

Tag Archives: easy

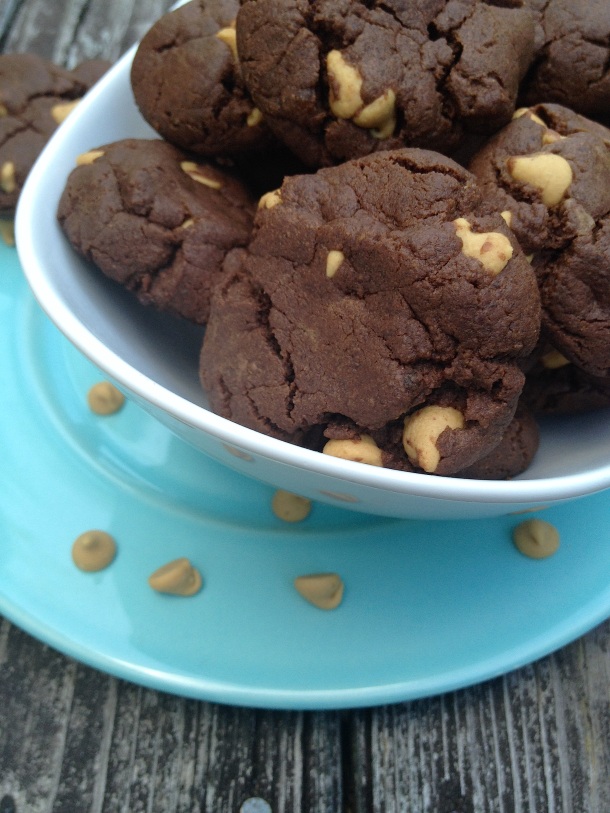
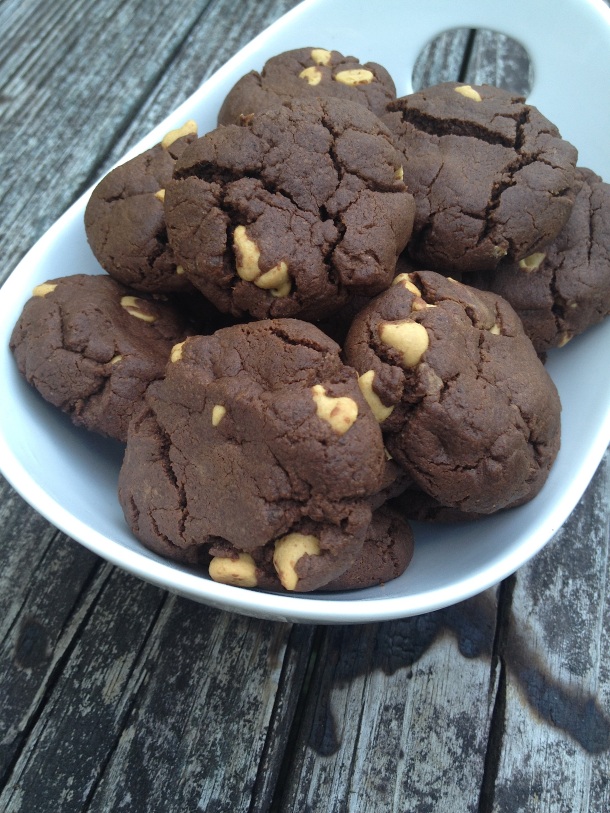
Flourless Chocolate Peanut Butter Chip Cookies

Posted on

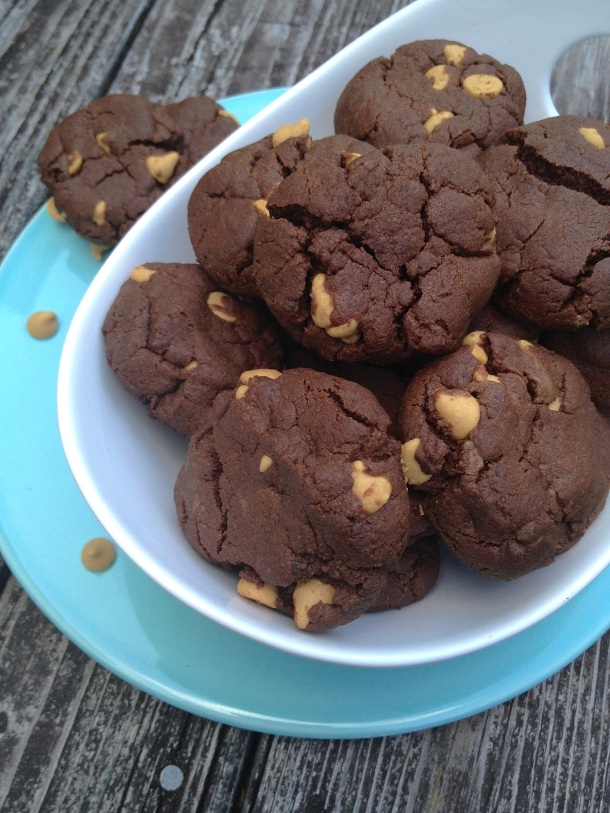
The beloved chocolate and peanut butter combination comes together in soft, flourless cookie. These simple cookies can be made, start to finish, in just about 30 minutes!

Flourless-Chocolate-Peanut-Butter-Chip-Cookies-Front

Everyone loves these Flourless Peanut Butter Chocolate Chip Cookies! I make them often.  We’ve made and mailed them to family and friends for birthdays, served them at parties, and bring them to potlucks. These are the quickest gluten free cookies I have ever made!

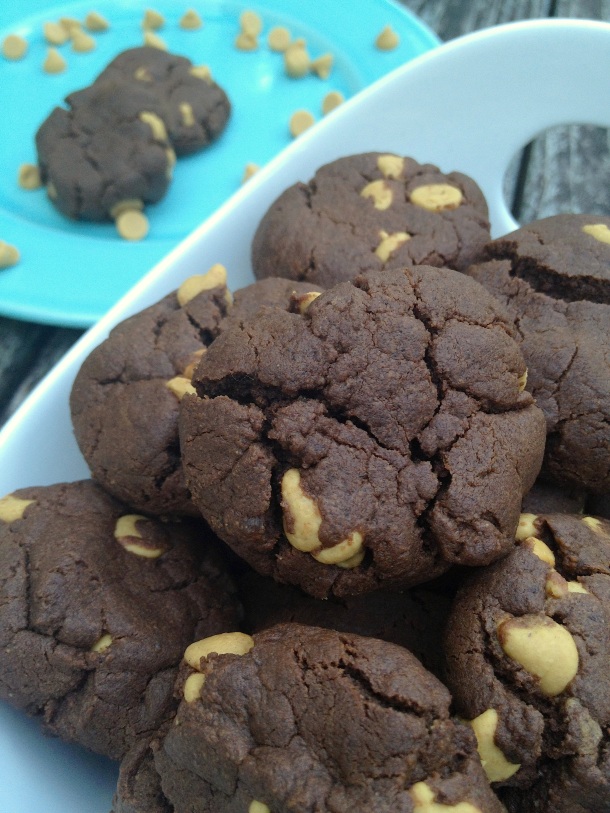
A few weeks ago, after agreeing to bring a dessert to a party, I immediately thought of the flourless peanut butter cookies. I wanted to do something a little bit fun, so I made some “opposite” cookie. My typical, peanut butter chocolate chip, and then some chocolate peanut butter chips.

Flourless-Chocolate-Peanut-Butter-Chip-Cookies-Over

I had the cookies baked and packed to bring to the party when Steve asked if he could just try one. He tried the Chocolate Peanut Butter Chip variety, and then tried another, telling me how soft they were. I had to have a bite. Sure enough, it was delicious. A moist, soft baked chocolate cookie with warm, melty peanut butter chips – how could it have NOT been an amazing cookie?!

Flourless-Chocolate-Peanut-Butter-Chip-Cookies-Close

So I unpacked the Chocolate Peanut Butter Chip Cookies and quickly snapped a few photos in the 10 minutes before we had to leave.

Chocolate-Peanut-Butter-Chip-Cookies-Tall

Steve wasn’t the only one who liked the cookies. I’m not one to brag about my cooking or baking, but everyone at the party enjoyed them, too!

Next time you need a dessert, these will surely be a hit! After all, who doesn’t like chocolate and peanut butter?!

Flourless-Chocolate-Peanut-Butter-Chip-Cookies-Over

Flourless Chocolate Peanut Butter Chip Cookies

Ingredients (makes about a dozen and a half cookies)
  • 1 c creamy peanut butter
  • 3/4 c brown sugar
  • 1/2 c cocoa powder
  • 1 egg
  • 1 tsp vanilla extract
  • 1 tsp baking soda
  • 1/2 c peanut butter chips
Directions
  1. Preheat oven to 350° F.
  2. Mix the first six ingredients (you can do this by hand or in a stand mixer with the paddle attachment).
  3. Stir in the peanut butter chips.
  4. Roll a spoonful of dough (about 1-2 tablespoons of dough) into a ball in the palm of your hand. Place cookie dough balls onto a baking sheet (a non stick baking pan will work fine, or use a regular baking sheet lined with parchment paper or a silpat). Using the palm of your hand, gently flatten the cookie dough balls just a bit (these cookies don’t spread a whole lot, so once you’ve flattened the cookie you only need about 2 inches between each cookie on the baking sheet).
  5. Bake for about 12 minutes. Finished cookies will be firm on the bottom, but still soft on the top. Let the cookies sit on the sheet for a couple of minutes, then transfer to a cooling rack or plate (or eat).

This recipe is linked to Gluten Free Wednesdays hosted by Gluten Free Homemaker, Gluten Free Easily, and Lynn’s Kitchen Adventures. Check it out!
Carrot Noodle Stir Fry

Posted on

Everyone needs quick & healthy meals ideas, and I have a great one for you today. Even better, this tastes like any oil coated, sodium loaded stir fry but it’s totally healthy. Carrots + broccoli + a 2-ingredient sauce. It doesn’t get much more simplier or healthier than that! Plus, this stir fry is naturally gluten free!

Carrot-Noodle-Stir-Fry-Chopsticks

So, carrot noodles. You’ve probably noticed vegetable noodles and spiralizers are all the rage on Pinterest and food blogs. I love the idea of eating my vegetables in noodle form but seriously have no room in my kitchen for another fancy appliance. It turns out that you can easily make vegetable noodles with a vegetable peeler, no spiralizer needed!

Carrot-Noodle-Stir-Fry-Sq-2

When I first started experimenting with veggie noodles, carrot noodles were not on my radar. I hate carrots. They taste like chalk to me. Even dipped in hummus – still gross. Then one evening Steve made some carrot noodles. It’s hard to remember how it all happened. I was in the bathroom vomiting from coffee withdrawal sickness and not really paying any attention to anything. Steve came in the bathroom with a small plate of food, saying I needed to eat. I was too sick to care and just ate whatever he gave me. I guess there had been some carrot noodles in there.

{If you’re interested in my coffee story, check back on Friday for a post about how and why I beat caffeine addiction!}

Carrot-Noodle-Stir-Fry-Over

Well, the carrots weren’t so bad. It turns out that cooked and flavored carrots taste amazing. There is really no carroty taste at all! I’ve now been honing my carrot noodle recipe, and found that carrot noodles are very well suited to stir fry. The carrots suck up all the flavors from the sauce. It’s very similar to eating a bowl of rice noodles slathered with sauce, but instead you’re eating a bowl of vegetables. Not only will you love how this stir fry tastes, but you’ll love how good it feels to be eating something that is truly healthy and good for you!

Carrot-Noodle-Stir-Fry-Tall

Carrot Noodle Stir Fry

Serves 1. For a more substantial meal, serve with rice. I cook 1/4c rice (dry) for each serving of carrot noodles.
 
Ingredients
  • 2 carrots
  • 1 broccoli crown
  • 1 Tbs olive oil, divided (or other cooking oil, like coconut oil or sesame oil)
  • 2 Tbs water
  • 1 Tbs Bragg’s Amino Acids (this is a soy sauce replacement. If you don’t mind the sodium, just sub in soy sauce)
  • 1 tsp chili garlic paste (check label to be sure it’s GF)
Directions
  1. Heat half of the oil in a small skillet over medium high heat.
  2. While the oil and the skillet are heating, cut the broccoli into florets. When the oil is hot add the broccoli to the skillet. Stir the broccoli until it is coated with oil and bright green. Add the water to the skillet (be careful, it may splash/steam), reduce the heat to medium, and cover. Let the broccoli simmer until it is tender, about 5 minutes.
  3. While the broccoli is simmering prepare the carrots noodles. First, peel the outer layer off of the carrots. Using the same vegetable peeler, continue to peel along the entire length of the carrot to make long noodle shapes. Once the carrot is down to the small stub you are holding onto use a knife to cut it up into small pieces. Do this with both carrots.
  4. When the broccoli is tender move it to a plate and drain any extra water out of the skillet. Add the other half of the oil to the skillet and bump the heat back up to medium high.
  5. When the oil is hot add the carrot noodles. Stir to coat them with oil. Continue to cook for about 3 -4 minutes, stirring. The noodles will go from firm to softer, and be brighter in color. Once the noodles have softened add the Amino acids and chili garlic paste. Stir to combine. Add the broccoli back into the skillet and cook for just a minute more to heat up the broccoli.
  6. Serve hot.

GF Peanut Butter M&M Cookies

Posted on

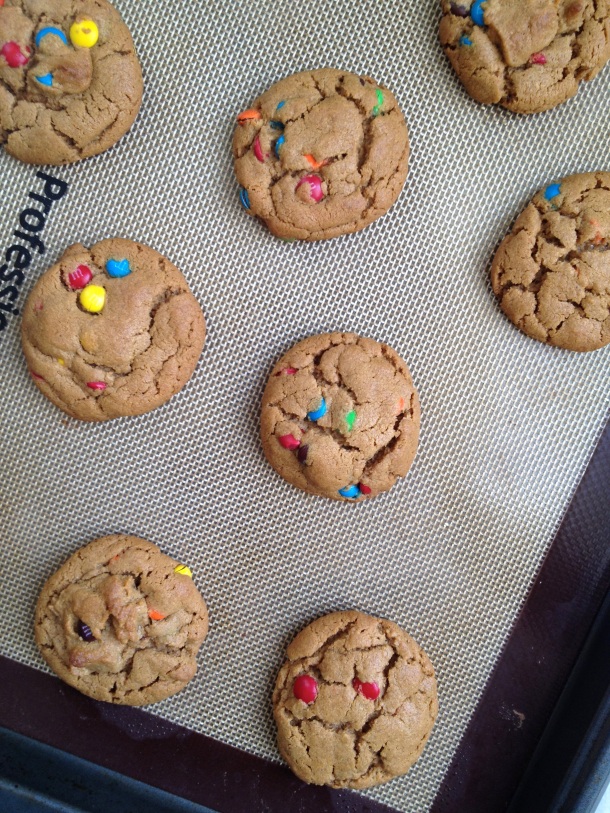
I’ve really been craving an m&m cookie. Not just today, or this week, but for months! When you eat GF you can’t just go to the store and buy some m&m cookies. You’ve gotta make them. So I did! And they were delicious and worth the wait!

Gluten-Free-M&M-Cookie-Sq

For how much I enjoy cooking, I really don’t enjoy getting out a dozen different flours/starches just to make some cookies. When I open the flour bags, a big cloud of flour always appears, and then ends up all over my shirt. No matter how hard I try to be careful and clean the counter top still ends up with a white flour coating. This is why most of my baking recipes are very simple, and my eBook only uses all purpose GF flour. Less flours = less chance for a mess.

I was thinking over how to make a GF m&m cookie without messing around with lots of flours. I had a few ideas, but the quickest and easiest was to use my Peanut Butter Cookie as the base of the recipe. With only 5 ingredients, none of which are flour, you can’t get much simpler! Especially for a gluten free cookie!

Peanut-Butter-m&m-Cookie-Sheet

With the exception of the m&ms, the five ingredients in these cookies are all pantry staples. Maybe other people keep m&ms on hand, but I don’t. And, being the thrifty shopper that I am, I waited for m&ms to go on sale before I bought them for this recipe. I was really ready for an m&m cookie by time I actually got around to making them.

It’s easy to whip up a batch in under half and hour, start to finish. Great for a last minute dessert or when you want to impress with soft, warm, freshly baked cookies and don’t have time for something complicated. Enjoy!

Peanut-Butter-m&m-Cookie-Tall

Gluten Free Peanut Butter M&M Cookies

Ingredients
  • 1 c creamy peanut butter
  • 3/4 c brown sugar
  • 1 egg
  • 1 tsp vanilla extract
  • 1 tsp baking soda
  • 1/2 c mini m&ms
Directions
  1. Preheat oven to 350° F.
  2. Mix the first 5 ingredients (you can do this by hand or in a stand mixer. I used my KitchenAid with the paddle attachment).
  3. Stir in the mini m&ms.
  4. Rill a spoonful of dough (about 1-2 tablespoons, but you can approximate) into a ball in the palm of your hand. If the dough is sticking too much run your hands under cold water, shake dry, and then try working with the dough again. Place the balls on a non stick baking sheet, or a regular baking sheet lined with parchment paper or a silpat mat.
  5. Bake for about 12 minutes total, rotating the pan halfway through the baking time. The cookies should be set and golden brown on the bottom but still soft on the top. Let the cookies cool on the baking sheet for a few minutes, then transfer them to a cooling rack or eat!


Lemon Lentil Soup

Posted on

Best soup ever.

Lemon-Lentil-Soup-Tall

If you’re looking for a bland, mushy lentil soup recipe then you have come to the WRONG place. This lentil soup is different from so many others. First off, the texture. Unlike so many other lentil based soups, it’s not mushy. It’s not quite creamy or chunky either. It’s just the best of all worlds. Even the texture of the lentils themselves is easy to customize to your own preferences. Cook for less time if you like lentils a bit al dente, or more time if you prefer softer lentils.

Lemon-Lenil-Soup-Sq

What’s really out of this world about this soup though is the flavor. The lentils simmer with onion and garlic, then cook in chicken stock to make a delicious broth. A splash of lemon juice and a sprinkling of cilantro take the flavor of the broth up to a whole other level. The flavor combination is perfect – nothing is too strong or too weak.

Lemon-Lentil-Soup-ABove

And have I mentioned how easy this soup is to prepare? Similar to my simple Avgolemono Soup, you dump some ingredients in a pot and let it simmer away for a while. Come back in about half an hour and you have soup. And not just any soup, but a seriously delicious and healthy soup!

P.S. Here’s the original recipe source. My version has extra lemon flavor and added cilantro!

Lemon-Lentil-Soup-Long

Lemon Lentil Soup

Ingredients
  • 1 Tbs olive oil
  • 1 onion, minced
  • 2 cloves garlic, minced
  • 1/2 tsp crushed red pepper flakes ( or more/less depending on tastes)
  • 1 tsp cumin
  • 1 1/2 cups brown lentils
  • 6 c chicken stock (may use vegetable broth for a vegetarian option. I’ve tried both and prefer chicken stock.)
  • 1/4 c lemon juice
  • 1/4 c chopped cilantro
Directions
  1. Heat the olive oil in a large sauce pan over medium heat. When the oil is warm add the onion, garlic, and red pepper flakes to the pan. Cook for about 5 minutes, stirring frequently, until the onions are soft.
  2. Stir in the cumin and lentils, followed by the chicken stock. Reduce the heat to low, cover, and let simmer for about 30 minutes. Reduce the cook time for firmer lentils, or lengthen cooking time for softer lentils.
  3. Stir in the lemon juice and cilantro.
  4. Serve hot (or let cool if you prefer)!

Dijon Quinoa & Green Beans

Posted on

Dijon-Quinoa-&-Green-Beans-Sq

This is an efficient side dish, great for a busy night. Its a grain and a vegetable all in one! The quinoa and green beans cook in the same pot. When the quinoa has absorbed all of the liquid and the green beans are tender you just stir in this 4 ingredient sauce. Little effort, little time, lots of flavor. Healthy, too!

Dijon-Quinoa-&-Green-Beans-Close

I usually serve this with some sort of chicken. Its a great side for anything grilled. I can be outside tending to the grill and just let the quinoa and beans simmer away without needing to stir the pot, add any ingredients, etc, etc. Have you ever gotten into that mess of needing to tend to something cooking on the grill and on the stove at the same time? I do often. I end up going back and forth between the kitchen and the deck every two minutes. Sometimes I burn something or forget an ingredient, other times I just temporarily can’t keep track of what’s going on.

Anyway, it’s not even quite grilling season but I’m still rambling on about it. I do really enjoy grilling though!

Back to the quinoa and green beans. Tasty, quick & easy side dish that’s naturally gluten free! Just make sure you check the label on your dijon mustard and creole seasoning to make sure both are gluten free. For a quick (and totally indoors) meal, try doubling the sauce and stirring in some shredded chicken. Yum!

Dijon-Quinoa-&-Green-Beans-Tall

Dijon Quinoa & Green Beans

Ingredients
  • 3/4 c quinoa
  • 1 1/2 c water
  • 8 oz green beans, trimmed and cut into 1 inch pieces.
  • 2 Tbs Dijon mustard (read label to make sure it is GF)
  • 1/2 tbs lime juice
  • 1 tbs lemon juice
  • 1 tsp creole seasoning (read label to make sure it is GF)
Directions
  1. Add the quinoa and water to a medium saucepan and bring to a boil over high heat. When the water is boiling reduce the heat to low, gently place the green beans into the pan (just kind of set them there – don’t stir) and cover. Cook for about 15 minutes, or until all of the water is absorbed.
  2. While the quinoa and green beans are cooking mix the remaining ingredients in a small bowl.
  3. Once the quinoa and beans have finished cooking pour the sauce into the pan and stir until well combined.


PGF: Macaroni & Broccoli

Posted on

Macaroni-&-Broccoli-Both

Macaroni & Broccoli is a quick, healthy pasta dinner. It can be difficult to make a quick GF dinner, and even more tricky if you’re trying to make that meal healthy, too. Since the base of the dish is pasta and there are no strong flavors this healthy, gluten free dinner will please picky eaters, too.

Really, this is so simple to make that it hardly needs a recipe. I set two pots of water on the stove over high heat. While the water is coming to a boil I chop some broccoli florets and garlic. When the water is boiling I add some brown rice pasta to one pot, some regular pasta to the other and steam the broccoli. If I’m not feeling lazy I may saute the garlic in a little oil, but it’s not a necessary step.

Macaroni-&-Broccoli-Tall

It goes without saying that you NEED to be careful when cooking GF pasta and wheat pasta side by side. Use two separate pots and get out two separate stirring spoons. I like to keep my GF pasta, pot, and stirring utensil on one side of the stove and the wheat-laden food on the other side. Package up any leftover pasta right when you are done with it to avoid any cross contamination! I time the pasta cooking times so that the GF pasta will be done first. I drain it, put in on the table, and then drain the wheat pasta when the GF portion is totally out of the way. If you take these simple precautions to avoid cross contamination your meal will be safe! (Of course, you could also make this meal entirely with GF pasta, or even entirely with wheat pasta if you don’t have a gluten intolerance).

Once the pasta is cooked I stir some broccoli and garlic in to each pot and dinner is ready! Super easy and dinner will be on the table in under 30 minutes! For a fuller meal, serve with a salad and some grilled chicken. You’ll still have a quick, simple dinner!

Macaroni-&-Broccoli-Close

PGF: Macaroni & Broccoli

See post for additional tips on safely cooking GF and wheat pasta simultaneously.
 
Ingredients
  • 1 c GF pasta
  • 2 c wheat pasta
  • 1 large or 2 small heads of broccoli
  • 2 cloves garlic
  • 1 tbc olive oil
Directions
  1. Fill two saucepans with water and heat over high heat.
  2. While waiting for the water to boil, cut the broccoli into small florets and mince the garlic.
  3. Place the broccoli florets in a steamer basket. Fill another sauce pan with an inch or two of water and put the steamer basket in the pan. Heat to boiling, and then reduce the heat to low and let the broccoli simmer for about 8 minutes, until tender. Remove from heat. (See this post for step-by-step instructions on steaming broccoli).
  4. In a small bowl, mix the minced garlic with the olive oil. If you’d like, you can saute the garlic and oil in a small saucepan over medium heat, until the garlic has softened, but this step is not required.
  5. When the pasta water is boiling, add the GF pasta to one pan and the regular pasta to another. Stir each, being sure to use separate stirring utensils. Cook each pasta according to package directions and then drain, starting with the GF pasta.
  6. Return the pasta to their respective pots. Add about 1/3 of the broccoli and 1/3 of the garlic/oil mixture to the GF pasta. Stir until the oil has coated the pasta.
  7. Add the remaining broccoli and garlic/oil to the regular pasta and stir to coat the pasta with the oil.

Cilantro Lime Rice

Posted on

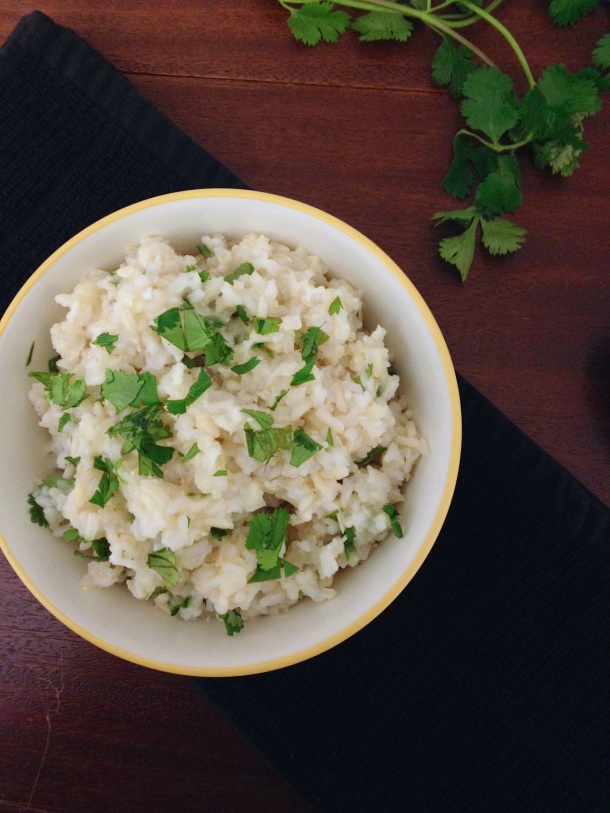
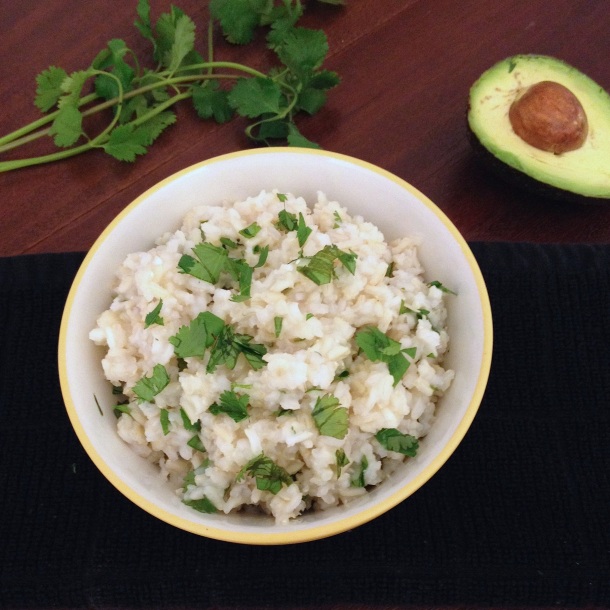
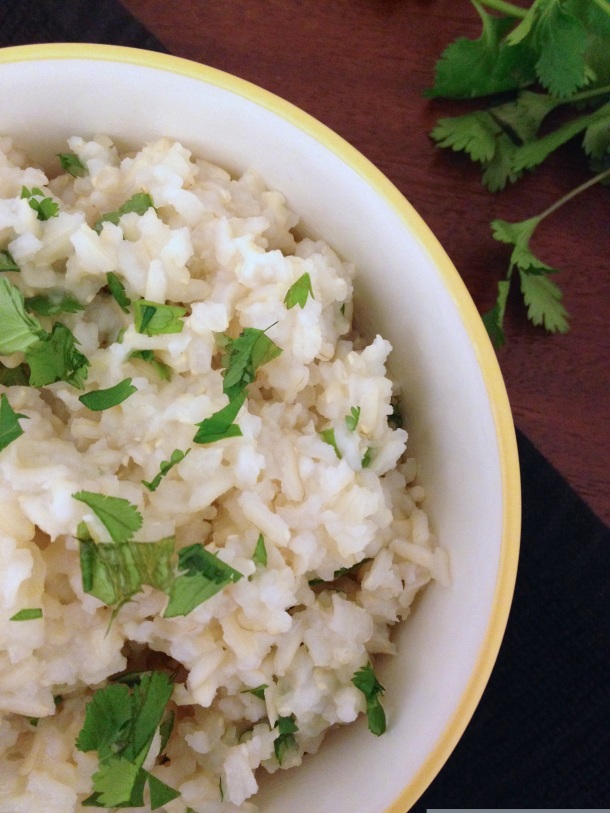
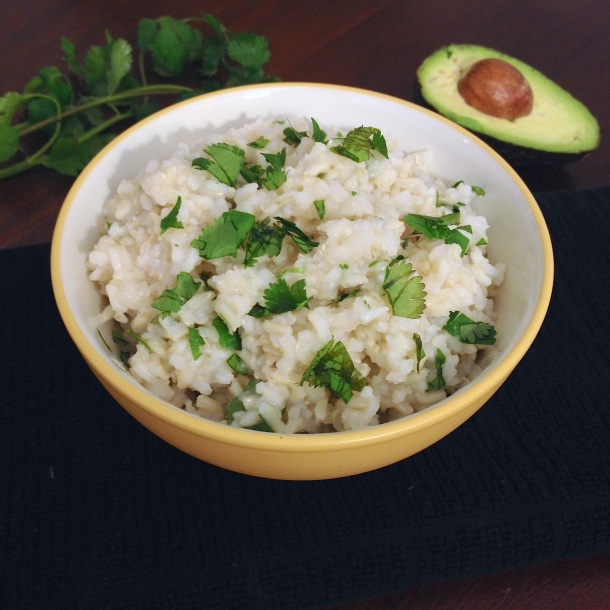
This version of Cilantro Lime Rice promises more flavor per bite than your average rice dish!

Cilantro Lime Rice 4

I love Chipotle. Apparently a lot of other people do, too, because I keep seeing copycat Chipotle recipes all over the internet.

I feel in love with Chipotle the first time I ate there. It’s a decent option for anyone eating GF, but what I really love most are the bold flavors. The spicy salsa is truly spicy! When I took a few bites of my first Chiptole taco and then had to drink some water because of the heat/spice I was a happy girl.

Maybe not everyone loves the hot salsa at Chipotle, but it seems that everyone loves the cilantro lime rice. After making my first copycat cilantro lime rice recipe a while ago (it must have been at least a year ago, but I can’t say for sure) I’ve been making it as a side for almost every Mexican-ish meal we have.

Cilantro Lime Rice 1

Since I can hardly stick to a written out recipe my version of cilantro lime rice has morphed from those copycat recipes. I no longer add oil to the rice – it seems unnecessary for having a good end result. I’ve also increased the lime juice and cilantro. I’m all about eating foods full of flavor and this rice is no exception.

Cilantro Lime Rice 2

As a side dish, cilantro lime rice is so much more interesting than plain rice. As a filling for burritos and tacos (or in taco bowls that I posted a picture of on Monday) this will add a whole new flavor into the mix!

Cilanro Lime RIce 3

Cilantro Lime Rice

Ingredients
  • 1 c rice (white or brown)
  • 2 c water
  • 2 bay leaves
  • 3 Tbs lime juice
  • 1/4 c fresh, chopped cilantro
  • salt (optional)
Directions
  1. Put the rice and water in a medium sauce. Set the bay leaves gently on top of the water and bring to a boil.
  2. Reduce heat to low, cover, and simmer until the water has absorbed and the rice is cooked. About 20-30 minutes for white rice, and about 45 minutes for brown rice.
  3. For best results, turn the burner off and let the pan sit on the burner, covered, for an additional 30 min.
  4. Stir the lime juice and cilantro into the rice. Seasoning with salt, if desired.
  5. Serve as a side dish or for a burrito or taco filling.

Taco Popcorn

Posted on

Taco popcorn brings together two of my all time favorite foods. Yup, tacos and popcorn.

Taco Popcorn 1

Freshly popped popcorn is just begging to be seasoned. Speaking as a popcorn fanatic, what really makes the popcorn so good is the flavoring on it, even if it’s just salt. Popcorn on its own is boring, but with the right flavor combination it becomes my favorite crunchy snack!

Taco Popcorn 4

Taco seasoning is one of my personal favorite ways to dress up plain old popcorn. Although I never use the packets of taco seasoning when I make tacos I always keep a packet or two on hand so I can make this popcorn at a moment’s notice. What can I say? Sometimes you just need the perfect snack!

Taco Popcorn 3

I’ve been making taco popcorn for years and years now, over the lifetime of several different popcorn poppers. Whether you use an air popper, a hot oil popper, or use the stove top method, this taco popcorn will come out great. I wouldn’t suggest using microwave popcorn as the base of this recipe – the end flavor is too rich, for my tastes at least. Since my current popcorn apparatus is a large saucepan I’ve written out the directions for that. If you have a hot air popper or hot oil popper, just pop the 1/2 c of kernals according to your popper’s directions and then hop into the recipe once the popcorn has been popped. If you’re weary of 2 T of butter there are a few options. Margarine works, and so does olive oil. A misto olive oil sprayer is a great way to moisten popcorn so seasoning sticks without adding a whole bunch of unnecessary fat to the mix.

Whatever your variation, I hope you enjoy this snack as much as I do!

Taco Popcorn 2

Taco Popcorn

See post for alternate ways to prepare the popcorn.
 
Ingredients
  • 1/2 c popcorn kernals
  • 1 Tbs vegetable oil (for popping on stove top)
  • 2 Tbs butter, melted
  • 1/2 packet taco seasoning
  • salt, optional
Directions
  1. Heat the vegetable oil in a large saucepan over medium high heat.
  2. When the oil is hot, add the popcorn kernals and cover.
  3. When the popcorn begins to pop, shake the pan back and fourth. When the popping stops for a few seconds remove the pan from the heat and carefully empty the popcorn into a bowl.
  4. Stir the melted butter into the popcorn. Sprinkle the taco seasoning over the popcorn and stir again. Season with salt before eating, if desired.

Grain Free Banana Pancakes

Posted on

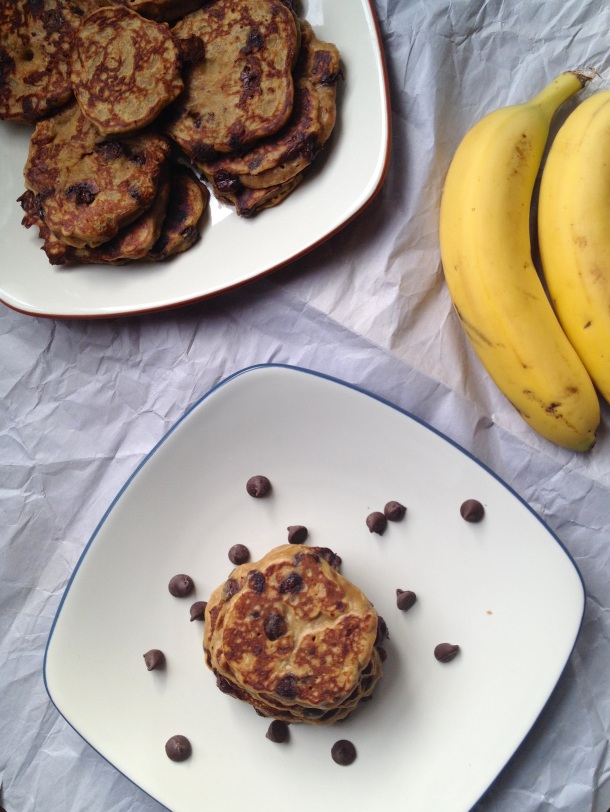
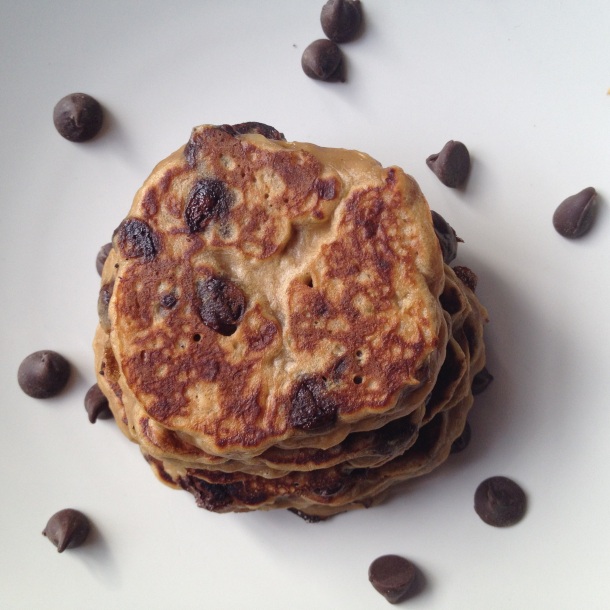
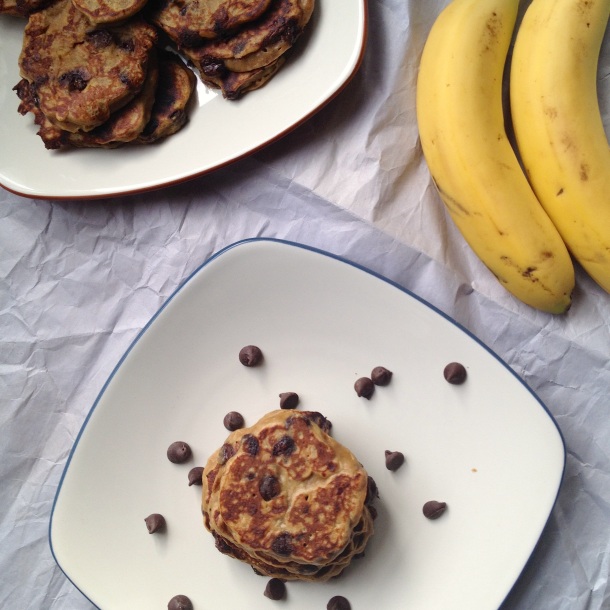
These pancakes have totally changed breakfasts around here.

Banana Pancakes 1

I found a banana pancake recipe on Gluten Free Fix months ago, and tried it right away. I think it was actually lunch that very day I first saw the recipe. Can you say delicious? Yes, yes, I can. These were soft and slightly sweet. I’d whipped up the batter in a matter of minutes and the pancakes cooked up so easily. The pancakes stayed together, and if you’ve been GF for very long you know how remarkable that can be!

Banana Pancakes 2

Now, my husband eats most anything, but I knew it was going to be a sell to get him to eat the banana pancakes. Enter, modifications!

First, I used some of the crunchy, cheap, store brand peanut butter. It’s totally different from the organic, all-natural stuff (aka there’s sugar in it), and the crunch gives the pancakes a unique texture.

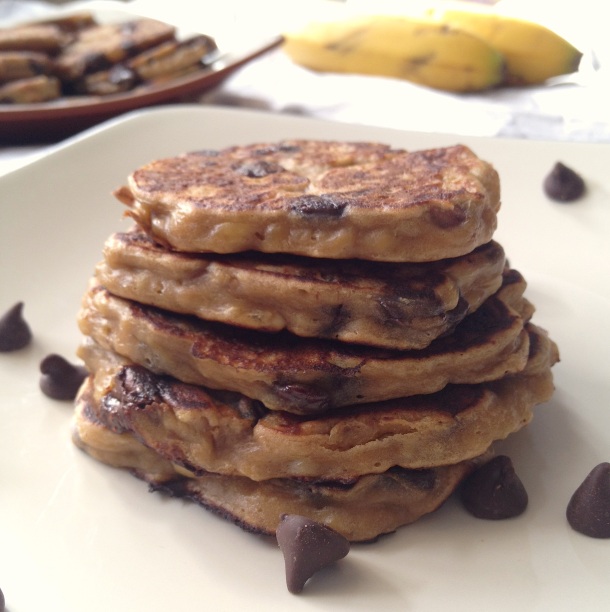
Second, I added chocolate chips. I hate to be one of those “everything is better with chocolate” people, but in this case it is true. A small handful of chocolate chips helps to detract from the strong banana flavor, adds a little more to the texture, and just in general makes the pancakes more fun.

Banana Pancakes 3

We now eat these pancakes multiple times a week, and have gotten our families hooked on them, too (Hi, Mom)! Now its your turn! You won’t be disappointed!

Banana Pancakes 4

Grain Free Banana Pancakes

To customize your batch size use any multiple of 1 banana, 1 egg, and 1/4c peanut butter. The cooking directions remain the same for any batch size.
 
Ingredients
  • 2 bananas
  • 2 eggs
  • 1/4c crunchy peanut butter
  • 1/4c smooth peanut butter
  • 1/4 c chocolate chips
Directions
  1. Mash the bananas. If they are not ripe enough to easily mash simply slice the bananas, microwave for 30-45 seconds, and then mash.
  2. Crack the eggs into the bowl, add both types of peanut butter and stir with a fork until everything is combined. This may take a few minutes as the peanut butter will be sticky. Finally, stir in the chocolate chips.
  3. Heat a non stick skillet over medium heat. When the skillet is warm, scoop pancakes into the pan using  large spoonfuls of batter. You may spread/flatter the batter with the spoon.
  4. Let the pancakes cook for a few minutes, until the sides are set and tops are partially set. Carefully flip each pancake and cook for a few more minutes on the other side, until it is golden brown.
  5. Remove pancakes from the skillet and repeat with any remaining batter.
  6. Serve hot or make these ahead of time and reheat in the microwave for a snack or breakfast on the go!

Healthier than the Box Cheeseburger Macaroni (GF)

Posted on

Christmas season is in full swing now and I feel like I should be posting a cookie recipe, not a dinner. I’m sure I will be doing plenty of cookie baking and sharing in the coming weeks (including my eBook with cookie recipes), but, in this hectic and busy time of year we need to eat more than cookies! This skillet dinner is warm, comforting, and ready in under in 30 minutes.

Hamburger Helper was the first meal I ever cooked on my own. My Mom has always loved the stroganoff variety so that was a frequent and favorite dinner in our household. Since it was a fairly simple dinner I would often be the one responsible for mixing up the sauce or making the ground beef, and eventually making the entire meal. I suppose all cooks have to to start somewhere!

7032 crop

Although Hamburger Helper was a totally viable dinner option in my childhood it is not now! When I was diagnosed with Celiac Disease in my 20s it immediately became a forbidden food. Still, sometimes I crave it, even though I know it is both full of gluten and not exactly healthy.

Enter this recipe. It is delicious. It will take you the same amount of time to cook as the boxed variety. The ingredient list is short and includes more whole foods and less processed foods. Adults and kids will love it. And best of all, you don’t have to feel a bit guilty about eating this or serving it to your family!

Healthier than the Box GF Cheeseburger Macaroni

 
Ingredients
  • 1 onion, chopped
  • 1 lb. lean ground turkey
  • 1/2 lb elbow shaped GF brown rice pasta
  • 2 c water
  • 1 1/4 c tomato sauce
  • 1/2 tsp mustard powder
  • 1/2 tsp onion powder
  • 1/4 tsp garlic powder
  • 2 c shredded cheddar cheese (this makes it very cheesy, feel free to use less)
Directions
  1. Add the chopped onion and ground turkey to a large skillet. Cook over medium high heat until the turkey is browned, breaking it into small bits as it cooks.
  2. Stir in the water, tomato sauce, mustard powder, onion powder, and garlic powder. When combined, stir in the pasta and bring to a boil.
  3. Cover and simmer (reduce heat to a medium/low) for 15 minutes, or until pasta is done.
  4. Turn off the heat and stir in the cheese.  Serve with steamed vegetables or a salad.